THIS MONTH ON MOMMY DIARIES

Ingredient of the month: Cream of Chicken Soup

Do you want to be our newest author? Click here!

Showing posts with label projects for mom. Show all posts

11.10.2009

New Carseat Cover Tutorial

I'm so excited that I actually made this carseat cover that I'm nearly blissful and to think that I can actually share it with everyone makes me even happier. I have looked online for tutorials on this and can't seem to find any. So I decided to make one myself.

Disclaimer: This is my first 'real' tutorial. If I missed something or something was a bit confusing just tell me and I'll try to explain it.

Hope you all enjoy. :)


Photobucket


Choose your fabric. It's fine to buy something a little cheaper for the back, since no one is going to see it. In fact I got both of these fabric pieces in the clearance section at Wal-Mart. You will also need, matching thread, batting for the middle, and binding for the edges. And alot of pins.
Photobucket


Take your old car seat cover and lay it flat on the paper you've chosen to use. You will have several sections you need to trace: A top, a bottom, and any sides or overhanging areas.
Photobucket

Now draw around the first section of the layed out car seat.. Generally speaking you can assume that the binding is hiding your seam so you don't need to make an allowance for it, but be aware that the issue might arise.
Photobucket

Be sure to mark any parts that lie on the inside of the pattern, like strap holes and any extra stitching.
Photobucket

Your patterns will start looking something like this.
Photobucket

When you cut out your pattern sections, remember to write what each line is for, and cut any holes so you can mark your fabric.
Photobucket

This bit of the pattern is a tad  trickier. This is the overlay that is found on the top and bottom of the carseat
Photobucket

As you can see, you can't just draw around it. So you're going to have to eyeball it. Don't get panicky! It's still just paper.
Photobucket

First I traced around any parts that I could.
Photobucket

Then I measured the center most point and marked the top on my paper (where I couldn't trace) I also measured a spot on either end where it was about an inch wide. In essence creating a connect the dots.
Photobucket

Then I followed that path around.
Photobucket

To make sure I had actually done what I wanted, I cut out the pattern piece and layed in on top of the section of fabric.
Photobucket

It was a bit off so I cut my pattern paper to match.
Photobucket

After you have cut them out. Lay them into your carseat to make sure everything fits. This is a moment when you can see any glaring mistakes you may have made (before you cut fabric).
Photobucket

Now pin the pattern to your fabric, being sure to avoid any bulging or folding fabric underneath.
Photobucket

There are two ways you can cut your pattern. You can trace around it with a pencil or other fabric friendly instrument. Or you can leave the pattern attached and cut around it. I generally like the former, since the paper can be annoying to work around.
Photobucket

Once you have all the pieces cut out, you should lay them on the carseat like you did the pattern paper earlier. I didn't get a picture of this. But it's worth doing, so you can catch any bad mistakes. Then repeat all the previous steps with batting and bottom fabric.
Photobucket

Because you have the batting in the middle and you are essentially quilting it is important to pull tight when pinning and sewing. If you don't you're going to get bunching and bubbling. Notice how I used my foot to hold one side while I pinned... yeah, I'm lazy. Just remember to let your sewing foot move on it's own as you are holding things tight (during the sewing).
Photobucket

Now is where we begin sewing. Use about a quarter of an inch straight stitch and if you need to, go slowly. You're going to want to stitch any inner parts as well (strap holes, corner stitches) right now as well.

When you are done going around the first time it's probably a good idea to go over it again with a zig zag stitch to secure everything and prevent fraying.
Photobucket

See....
Also remember that the zig zag should not go OVER the straight stitch. The zigzag is like a dirty little secret we want to keep hidden. No one needs to know you did this part because it's not pretty.
Photobucket

Also check your back to see if you missed any of the solid fabric. I did at one point and needed to stitch over that section again, a little closer in.
Photobucket

  You should have your top and bottom parts all sewn together (both fabrics with the batting in the middle). Now you need to sew these two sections together. Lay the pieces right sides together and pin. You probably want to check your old cover to make sure you pin to the right points (and not to high up).
Photobucket

Like so....
I've already stitched the buckled opening(that circular part in the center) so all I need to do with that is put on the binding.
Photobucket

Sew the top and bottom together. Go slowly if you need to. Remember to align any extra stitching you've done... probably a little better than I did.
Photobucket

Now is when things start heating up. The overlays (the parts that really secure the cover to the carseat). These fit a little differently and aren't as easy to pin. And if I were to do it over I would have sewn the binding on these parts BEFORE I sewed them onto the rest of the cover.
Photobucket

See how the pins area little bunchy. That's because I had to mold the fabric sections together. So when you begin stitching you'll need to hold these parts to their right spots... they won't like it, but it's important.
Photobucket

Now you get to start on the binding. It's a bit awkward to work with and requires a lot of pins. You'll want to make sure your fabric fits snuggly into the fold without being doubled over. Pin the binding to every place that the old cover had binding. Most especially the visible parts. This is what will give it the 'finished' look (and cover the seams).
Photobucket

Straight stitch close to the inside edge, but remember that you want to catch the fabric that is now inside the binding.
Photobucket
The binding around the buckle opening was the hardest. I used a lot of pins and it still didn't turn out very cute. (sorry bad picture)


But...once your binding is on you should have the finished product! If it didn't work out I'll allow you to cry.
If it did...
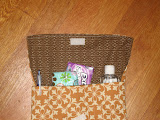
Voila! The baby loves it.
Photobucket
cannwin.blogspot.com

10.24.2009

Saving Memories

So my girl had her baptism today. And with the help of Jill and her wonderful Bayberry Announcements I was able to send out some dang cute cards for all that family who couldn't make it out for the event.

But I had a few left over and I wanted to do something to help my little one remember her great day.

*light bulb turns on above head*

You know how you go to weddings and people have you sign the matting around their photo instead of a guest book? Well, I took that idea and twisted it just a bit.

Instead of having people just sign their names, I asked if they would please leave some words of advice or encouragement for her on this important day in her life.


We live in a small branch so there wasn't very many people to sign it, but I think it turned out nicely don't you?

Now she will have a beautiful momento to keep for years to come and perhaps when things get a little tough she can look on her wall and see that others love her and understand.

Feel free to use my little idea. *wink* I told my husband it was such a good idea that by next year everyone in the church would be doing it (which would please me immensely) :).

4.05.2009

One Hour Craft - Fabric Flowers

April craft time.... just in time to make some cute flowers for your little girls, or yourself!! These flowers I just made up myself and are very simple... I'll try to explain the best I can.

First, start with a bunch of circles of fabric. They are all pretty much the same size, and they don't have to be perfect. I like using a couple different fabrics together, like the black polka-dot and then I used some black tulle. Same with the pink.... you'll see later.

Second, take one of the round pieces and bunch it up in your fingers.... like so....
Then take a needle and thread and start sewing together your bunches. It helps to kind of shape and sew as you go, pulling up material in the needle to make it look the way you want. Does that make sense? Probably not.... sorry.
After I had one bunch done, I just slipped another circle onto my needle and thread and did the same thing. So, I had about 3-4 circles sewn together, and then I added the tulle at the bottom. In the next picture, you can see the bottom, I took a much smaller circle, and sewed around the edges to make it look a little more finished (plus it is easier to glue or sew it onto something else).
Here's the pink one all done! Isn't it cute!!
And the black....

These are fun to use on whatever, hair bows, headbands, bags, dresses, belts, whatever suits your fancy!! Have fun, and please share if you make some, so we can see all the great ideas!

3.11.2009

One Hour Craft - Mirror Necklace Holder

Okay, are you ready for another really fun and simple craft? I loved making this, it was easy, fun, and very functional. I normally just have my necklaces strewn all over the place and this was a great way to help me organize them a little better. So.... what you need:

- a plain wood picture frame, any size you want
-material, enough to cover the frame and little extra to cover
the middle part inside
-a mirror, it should fit in the hole of the frame
(these are really cheap at Michaels, come in a variety of shapes, and have about 4
in a package, so if you live close to people and want to make these together, share
the mirrors, or make a bunch and give them as gifts!)
-knobs or hooks (however many you want, I used two)
-glue gun, modge podge, and ribbon for embellishments

First - cut out your material to fit your frame, leave about 1 inch to wrap around the back. Don't forget to cut out the center hole. Now, using modge podge, pull the material tight and glue it to the back of the frame. Make sure you go over the edges really well with the glue.

Second, take some cardboard (or in my case, I had some cork board laying around) and cover it the same way you did in the first step. This is going to go in the frame, in place of the picture, and we are going to hot glue the mirror to this piece, so it should be sturdy.

Third, stick the covered carboard piece into the frame and secure it, then using hot glue, glue the mirror in place in the middle of the frame. Then, take your knobs and hot glue them where you want them on your frame.


Lastly, I used some ribbon, and made a little flower out of fabric and hot glued them on. Now, add some jewelry, hang it up and pat yourself on the back!! This was such a fun project to make. I hope you enjoy, and PLEASE don't forget to post a picture when you are done!!!PS - I wish I could take credit for this idea, but I'm not THAT creative! :) I got this idea from here.... she has a little different take on it, but very cute none- the- less, and you may think her tutorial is better. It's okay if you do, I won't be mad. I like mine because of the mirror, I always need a mirror when I put on my jewelry.

To see more examples from other contributors click here.

3.09.2009

The $1 Project

My little girl has had this big closet door she's been trying to deal with for several months now. It's one of those annoying ones that's always falling off the hinges and since she's only seven it makes it difficult to keep that area of her room looking kept up. Finally the other day I had an idea, I decided to put up a curtain instead.

So I rummaged around a little and found an old shower curtain we weren't using, and the an old shower rod and went to put it up... except the curtain wasn't long enough.

Easy enough to fix, I thought, I've got enough fabric lying around. So I put the baby down for his nap and hauled my find down to my sewing machine. I didn't really measure anything, just eyeballed it, but it was all straight line stitching so it wasn't difficult. This is what the bottom turned out like:

This is where the dollar comes in, I didn't have any rings for the shower curtain to hang from. So.... on my way to pick the kids up from school I stopped off at the Dollar Tree and bought a set. All in all it took me about two hours (if you count the going to the store into it all) and this is what I got:Now my daughter can get into her closet, and because of the white fabric the room has an airier feel to it. She's very excited (as am I), and it was so easy to do that I've started eying the boys closet too. Plus, I just put the old closet door downstairs. That when when we decide to move again we'll be able to put it right back up without it having excessive damage from years of kids trying to open and shut it.

Next, I think I'll find some fun iron on's to put on the white of the curtain, just for effect.

3.06.2009

Clever Idea's

I found this one over at whipup.net (which really just sends you to other places they found it at), but it's such a great idea I had to share. Baby Food Jar Pincushion.

Enjoy.

2.17.2009

One Hour Craft

I LOVE crafting. Let me tell you, I’m NO expert, I just love working with my hands, seeing something that I created with my hands, and I love the feeling after I complete a project and it actually works! J So, I thought it would be fun to start a little craft corner on the mommy blog. My hope is that I can find and post crafts that EVERYONE can do, that are simple, in-expensive, only take about an hour, and FUN! Remember to have fun and get creative!!

This month, we’ll be making placemat bags. These are great bags that are perfect size for lots of different things. I’ve used them for gifts, my favorite is to make a little church bag out of it, add tissues, gum, a scripture marker, etc. I’ve also used them as my everyday purse, and they hold up great, plus you can have one to match every outfit.

Some tips

  • place mats are inexpensive, so watch for them to go on clearance, at the end of each season.
  • My favorite place to buy placemats are places like Pier 1, Marshalls, TJMaxx, and even Target!
  • When you are buying a placemat for a purse, you want to keep it pretty thin and flexible, something that will go through your sewing machine easily.
  • Handles can be either ribbon or plastic. You can find handles at any craft store (look for coupons!). I like the cute bamboo ones, but ribbon works just as great, is less expensive and you can also embellish with it.
  • If you want to get fancy, you can add a snap or button closure…. Maybe not for beginners, but definitely easy and fun.

So, let’s get sewing!! This is the place mat I chose, it is from Macy's, cost 5$ and is a GREAT sturdy, well-made place mat. Plus I loved the colors!


First, decide how you want your handles. And decide if you want any embellishments on your bag. We will sew both of these on first. After I laid it all out, I first sewed on the brown ribbon, just for an embellishment. Then I sewed on the little bow, and then started on the handles.


Here are the handles sewn on.....

Now, fold your bag inside out, or with RIGHT sides together. Line up the edges, and sew up the sides, about ½ inch from the outer edge. Don’t forget to back-stitch at the top where your bag will be opening a lot.

After the sides are sewn up, we're going to make square corners. It is easy, don’t get scared. Leave your bag inside out, hold your bag upside down and put your hand in so that your fingers (your 3rd finger) are in the corner. Now, with your other hand, pinch your bag on the seam so it makes a little triangle. Here is where you will sew; it makes it a little easier to sew if you push the seam open, like the picture below. Do the same on the other corner.


AND....fold your bag right side out, push out the corners, admire your work, and TA DA!!! You are done! Now, fill it with all sorts of goodies, post a picture and let us all admire your fabulous crafting!! We want to see everyone's unique styles and different ideas, so please post a picture of what you did!!

To see more examples from other contributors click here