THIS MONTH ON MOMMY DIARIES

Ingredient of the month: Cream of Chicken Soup

Do you want to be our newest author? Click here!

12.22.2009

More fun Christmas Websites

Here are a couple more fun Christmas websites that my kids got a huge kick out of!

Chin Carolers  (12 days of Christmas was my favorite!)


Merry Christmas!

12.21.2009

The Magic of Santa


While we all know the real reason for celebrating Christmas...pondering the birth of our Savior Jesus Christ...I also love the magic and thrill of Santa Claus. I loved it as a kid but I love it even more as a mom. Here are some fun activities to add to the magic...


Last year we tracked Santa all during Christmas Eve to see where he was dropping off gifts. Once we saw him getting closer and closer we knew we better hurry and get to bed. The kids were very excited! You can track Santa's movements HERE.


This year, my husband also had a personalized message from Santa sent to each child. Aside from telling them they've been good and giving specific information unique to each child Santa also let them in on a fun (and magical) secret...like how his reindeer fly or what he does during his summer break. You can get Santa to email your child by going HERE.

12.18.2009

And The Winner Is....

Jane!
Jane said...
My sister and I had these little accordian albums made for our parents with pictures of their grandkids inside so they can have them with them always.
Please email mommydiariesadmin@gmail.com by 2pm Saturday so that we can get it shipped to you in time for Christmas!
Thanks to everyone who entered this giveaway...it was so fun to see the special gifts you are giving this Christmas!

12.14.2009

Final Christmas Giveaway: 4 Laura Numeroff Books!


Our final giveaway for 2009 has arrived and you won't want to miss out on having these books under the tree for your little ones! If you're like us...a new book is as much fun for the child as it is for the parent (and 4 new books is even better!) The "if you give....books" are for ages 3-7 years old and are fun to read over and over again! Kids also love the illustrations by Felicia Bond!

To enter this giveaway just leave a comment and answer this question:

What is the best gift you are giving this year? Is it what your kids (or husband) have been begging you for? Is it homemade? Is it a service?

This giveaway ends Friday, December 18th at 11:59pm (eastern time) and in order to get the 4 books to you in time for Christmas we need the winner to email mommydiariesadmin@gmail.com with an address by Saturday, December 19th at 2pm.
Looking for extra entries? Here are some things you can do:
  • 1 extra entry for being or becoming a follower (over there on the left!).
  • 1 extra entry for adding our button to your blog.
  • 1 extra entry for blogging about the giveaway or putting it on your facebook status.
    If you do any of these things (or already have) please remind us in your comment and we'll be sure to give you your bonus entries!

Thanks for being a part of Mommy Diaries and Merry Christmas!

12.13.2009

And the winner is...

CRYSTAL

Congrats Crystal! Email Sweet Jane at sweetjanebows@yahoo.com and let her know which 2 bows from her blog you would like her to send you, and also give her the address of where to send them!

Thanks to all who entered and a BIG thanks to Sweet Jane for letting us give away her cute bows!

And don't go too far because we'll be posting our 3rd and final Christmas giveaway very very SOON!

12.07.2009

Christmas Giveaway #2 Sweet Jane's Hair Clips

Are you ready for our Christmas giveaway #2? Wouldn't these clips make the perfect stocking stuffer or gift for a sweet little girl?

These adorable clips (and many many more) are made by Sweet Jane and can be found and purchased on her blog here:
butterfly1
And she has agreed to give away 2 clips of your choice to one of our lucky readers! Here's what you have to do to enter!
First go over to her blog and check it out! Then come back and leave a comment here telling us what your favorite clip is!
Giveaway ends Sun, December 13th at 11:59pm (mountain time).
Winner will be chosen using random.org and posted Monday morning.
If you are a winner email sweetjanebows@yahoo.com within 24 hours with your clip choice (you get to pick 2 clips from the ones she currently has on sell on her site) and the address where you want them sent.
To get extra entries do any of the following:
  • become a follower of Sweet Jane's blog
  • add Sweet Jane's button to your blog
  • become a follower of Mommy Diaries
  • blog about this giveaway or post it on facebook
  • make a purchase on Sweet Jane's blog during the giveaway (3 extra entries!)
Make sure you let us know which of the above you did! And if you are already a follower of Sweet Jane or Mommy Diaries or you already have a button just let us know!
** We prefer that you only leave one comment including all your extra entries, but if you do leave more than one because you're switching between blogs or forgot to mention something, that's ok. We figure it all out in the end! :)

Good luck and remember to check again next week for our last Christmas giveaway!

Buckeyes


I don't know why, but in my house growing up these were always a Christmas treat. They aren't particularly Christmassy when I think of it logically, but as far as nostalgia goes, they will always mean Christmas to me.

1 1/4 C peanut butter
3/4 C butter (softened)
3 3/4 C powdered sugar
12 oz. chocolate chips
1/4 stick paraffin

Combine peanut butter, butter, and powdered sugar.
Chill.
Roll into balls. I like to make mine small. Think one bite. My mom's were always three bite sized. The point is: make them however big or small you want.
Melt chocolate chips with paraffin. This is to help the chocolate coating set and not melt as easily.
Coat the peanut butter ba... spheres in the melted chocolate.
Cool on wax paper. I like them after they have chilled in the refrigerator for a while.

a few of my favorite things.....

Crafting at Christmas.... oh boy, that list will never end. Christmas time seems to the be the time for everything, crafting, yummy food, giving gifts, family parties, etc. So, it was really hard to think of one craft to share with you all. I also feel a little guilty because for the past few months my crafts have been "copied" from other crafters around the blog-o-sphere. My apologies, I have very high hopes for myself come january. In the meantime, I wanted to share just a couple of some of my favorite little crafties for this month. If you click on the picture, it should link you to the tutorial.
A Christmas planner.... what a great idea. I have lists and lists and hidden lists all over my house, and receipts floating everywhere, this would really help me get a handle on things!


Isn't this a great idea for little gifts? Good clean fun. Hand sanitizer, all she did was rub the labels off, and add stickers and ribbon. Brilliant. And adorable!


These are little goodie bags with treats and Christmas tree toppers in them! So fun, and simple, especially if you are the scrapbook type and can make cute labels like this....

This is SUCH a great idea, and wonderful way to use up scraps of material! It makes a super cute, easy, fun, economical gift for ANY time of year. I made some towels for my kitchen to match my chairs i recovered and it was so easy and really pulls my kitchen together. Love it. And the coasters are awesome!

MERRY CHRISTMAS and happy crafting!!!

And The Winner Is....

Chalece!

Chalece said:

I have never been so excited about Christmas as I am this year. I love being a parent! I am planning so many fun Christmas-themed activities for my family, and I am so excited to see Brielle's face on Christmas morning. So, my favorite thing about Christmas this year is Brielle. I am a follower. I have your button on my blog. I blogged about the giveaway!Thanks, you girls are great.

Email Mommydiariesadmin@gmail.com to claim your prize within 24 hours!

Thanks to all who entered...stay tuned for Christmas Giveaway #2 coming soon!!!

12.01.2009

Christmas Giveaway #1: 4-Piece Cookie Cutter Set


It's Christmastime and we want to thank you for a year full of great mommy moments here on Mommy Diaries! Each week for the next 3 weeks we will be giving something fun away to use with your kids...or save to put under the tree from you know who.

This week we're giving away a 4-piece cookie cutter set so you and the kids can make some fun cookies to share (or eat all yourself.) The set was donated by Cheap Cookie Cutters...a great place to find any possible cookie cutter you need. Don't believe us? Need a cookie cutter for any possible breed of dog? Looking to teach your child a geography lesson? Get any state cookie cutter...or all 50! Or if you can't find that Little Mermaid cookie cutter your daughter is begging for anywhere...you haven't checked their Disney cookie cutter selection.

The Christmas set we're giving away this week includes a candy cane, a stocking, an angel, and a christmas tree. All you have to do to enter is leave a comment and answer the following question:

What is your favorite thing about Christmas?

Is it the music? the family time? the suspense? the giving? the cookies?
(for me it's our Christmas Eve traditions)

Here are the giveaway rules:
Only ONE comment per person, additional comments will be deleted.
Giveaway ends Sunday, December 6th at 11:59pm (eastern time).
Winner will be chosen using random.org and posted Monday morning.
If you are a winner email MommyDiariesAdmin@gmail.com within 24 hours with the address where you want it sent.

Looking for extra entries? Here are some things you can do:
1 extra entry for becoming a follower (over there on the left!). If you leave a comment and you already follow then you automatically have an extra entry!
1 extra entry for adding our button to your blog. If you already have one just remind us in your comment.
And 1 more extra entry for blogging about the giveaway or putting it on your facebook status.
***If you do any of these things DON'T leave an additional comment. Just make sure you let us know in your 1st comment and we'll figure in all the extra entries at the end. (If you forget to mention any of these things or you do them after your first comment has already been posted, don't worry! Go ahead and leave another comment and we'll record your extra entries and then delete your second comment.)

Christmas Music

I love the Christmas season! We have had our tree decorated for over 2 weeks but we've just started listening to Christmas music. I get one Christmas cd every year. I'd like to know what your favorite Christmas cd is. I'd also like to know if you have some great children's Christmas music as well. My daughter loves to listen but some of them get boring for her. I love the Josh Groban Christmas cd, we got that one last year.

So, what do you love listening to during the holidays?

11.24.2009

Eating Strategies

I have written before about my 3 yr old son, Ian, who is the pickiest kid I know! Well, we recently found out that there is a medical reason for his pickiness. He has been diagnosed with celiac disease. Now that we know what Ian can and can not eat we are using many different creative techniques to get him to try new things. I thought I would share some of these methods with you ladies and if you have any tricks to getting your kids to try new things please share!!!
Here are my tricks:
1. Making food fun. This picture shows our edible sailboats. Ian love eating these sailboats! Sometime we just put the food in a fun pattern on the plate, cut the cheese in cute shapes, or let him build houses out of the cheese planks.
2. Food races. This is not a race to see how fast you can eat!! Ian will run around the house and has to eat a bite before he can go around again. I usually put my leg up as a barrier and after he takes his bite (chews and swallows it too of course) I lift up the gate and let him go. He never tires of a food race.
3. Animal bites. If he is trying something new and is hesitant to take a bite we try different animal bites. We go smaller and smaller until he agrees to try that size of a bite. Kitty bites, mouse bites, etc.
4. Tea Party Plates. This was my mom's favorite way to get me and my siblings to eat. She would make a little plate with lots of little things and call it a tea party. We do this often for lunch or snack time.
5. Quizzes. This one is our newest trick. Ian is really into words and what they start with. So we quiz him and when he gets the right answer he gets a bite. For example, "what letter does plate begin with?"
6. Hiding the veggie. Ian will NOT eat a veggie to save his life. He says when he is 4 he will eat a carrot. I am counting down the days until his 4th birthday!!! So I try to hide the veggies in things. He will eat muffins (Gluten free ones now) so I make pumpkin muffins or zucchini muffins (pureeing the zucchini). I have also been putting carrot juice in my jello. The big box of jello calls for 4 cups of water (2 hot and 2 cold). I put in 1 cup of carrot juice instead of one of the cold water cups. A few marshmallows on top and it is irresistible!
You may think this is all ridiculous, if you do...then you don't have a problem eater! The rest of you share your own tricks please!
Happy Thanksgiving!

11.22.2009

Frog Eye Salad

I've never been a huge fan of Frog Eye Salad before but my grandma asked me to make some for our early Thanksgiving get together this weekend so I found this recipe online and when I was done making it I was surprised at how much I liked it.  So I thought I would pass it on!  I got this from Cooks.com.  


1 c. uncooked Acini Di Pepe pasta 
3/4 c. sugar
2 tbsp. flour
1/2 tsp. salt
2/3 c. pineapple juice (from canned pineapple shown below)
2 eggs, beaten
1 tsp. lemon juice


Cook Acini Di Pepe: Bring 6 cups water to a rapid boil in 3 quart saucepan. Add 2 teaspoons salt. Slowly add 1 cup Acini Di Pepe. Return to rapid boil, stirring to separate. Boil only 2 minutes. Cover and remove from heat. Let stand 6 to 8 minutes. Drain immediately and rinse with cold water to chill. 


In small saucepan, mix sugar, flour, salt; stir in pineapple juice and egg.  Cook over moderate heat, stirring constantly until thickened (or cook in microwave).  Add lemon juice, set aside and cool.  


Combine cooked, cooled mixture with cooled Acini Di Pepe.  Cover, place in refrigerator until chilled.
Add the following:
2 cans (11 oz each) mandarin oranges, drained
1 can (20 oz) pineapple tidbits or chunks, drained
1 can (20 oz) crushed pineapple, drained
1 carton (8 oz) dairy whipped topping
1 c. miniature marshmallows


Stir lightly.  Chill at least 1 hour before serving.
Serves 8-10

11.19.2009

Fresh Corn and Wild Rice

Okay I've been a little MIA for a few weeks... or months. Things are not really settling down, but I'm trying to get back to the things I did before baby #2. Yes, yes I know, I sound wimpy because there are moms out there who have 3, 4, even 5 kids and have an easier time getting back on their feet. But, I have a bit of a special circumstance.....

Here's my thanksgiving side dish, from none other than the PIONEER WOMAN. I love this lady, and I made this corn side dish last year and it was a HUGE hit, I LOVED it, and can't wait to make it again this year.... maybe, if I get around to it. :)

Here it is:

Fresh Corn and Wild Rice 

Ingredients

Directions


  1. 1
    Preheat oven to 350 degrees.

  2. 2
    Cook wild rice in chicken broth until almost done. Rice should still have a firm (but not crunchy) bite. Drain rice and allow to cool.

  3. 3
    Scrape corn kernels into a large mixing bowl. Add in cream, butter, beaten eggs, salt, and cayenne pepper. Stir together.

  4. 4
    Add in cooled wild rice, stirring gently. Splash in milk so that mixture is stirrable, but not overly juicy.

  5. 5
    Taste for seasonings, adding more salt or cayenne pepper if needed.

  6. 6
    Bake for 30 to 45 minutes, or until just turning golden brown on top and mixture is somewhat set.

11.18.2009

Tricks of the Trade: Baby Bowels

I have a bit of an odd question for this week. My little one is 4 months old, she is completely breast fed and... she doesn't poop every day. Is that normal? I can't remember if that ever happened with my other kids, but I don't think it did.

She can go two or three days between bowel movements and it's a bit unsettling. Is it something that is worth bringing up with a doctor or is it more common than I realize?

11.12.2009

Udder Covers

Dear Mommies,
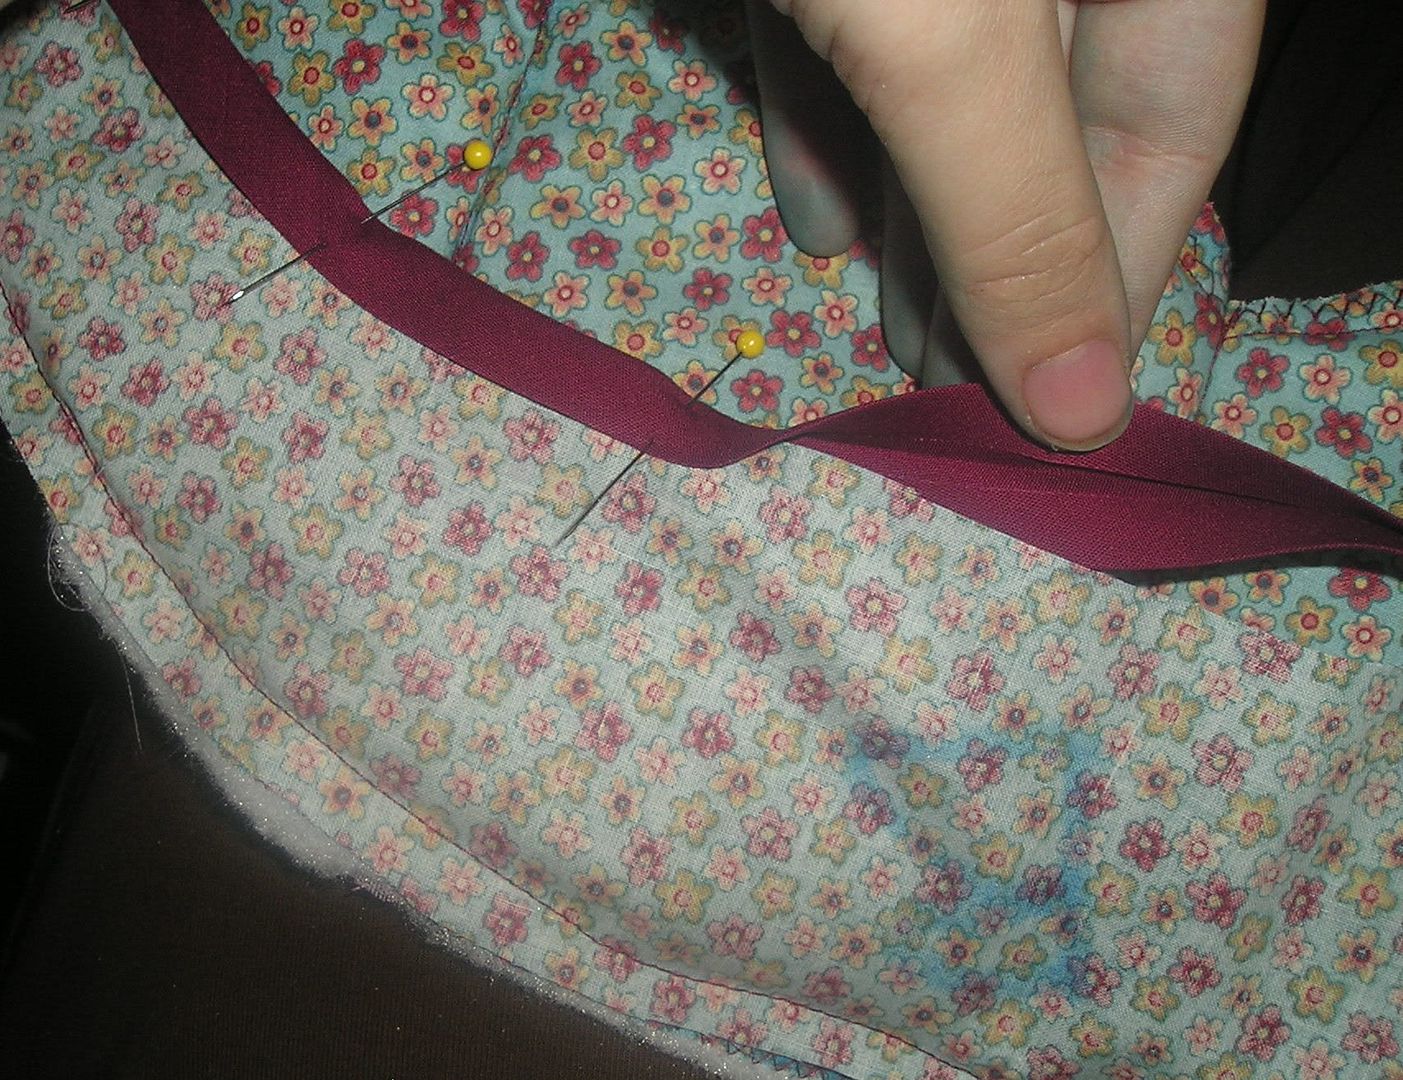
Here's another deal that I thought was too good to pass up. I wasn't sure I wanted to endorse it but I just got mine in the mail today and I LOVE IT! I won't go into how awkward I am when I try to nurse one of my babies or how much I detest doing it in front of people but now that the third baby is on the way I don't know if I'll get as much privacy as I did with the last two...between scooting to school or other activities. So I am hoping this will help. I have friends who swear by this product as well. And if you aren't a nursing mom I think this makes a great (and affordable) shower gift for someone else. Udder Covers retail for $32 but use a promotional code and it's FREE (but you do have to pay $8.95 in shipping.) Use the promotional code: backorder1 and find one you love HERE.
Hope you love yours as much as I love mine!

11.10.2009

I LOVE FREE STUFF

So a freind of mine blogged about this so I thought I would pass it on. I just got done ordering 50 FREE Christmas cards from seehere.com 100% FREE even the shipping was FREE and I didn't have to enter any credit card information. I guess its backed by fuji film. Use the code freebies4mom-1109
It good through November 30.
I'm pretty excited since I wasn't going to send Christmas cards because of the price, now all I have to pay for are the stamps.
Here is the link if you want to check it out
-OR-
Here is the link if you want to go straight to seehere.com to get started

New Carseat Cover Tutorial

I'm so excited that I actually made this carseat cover that I'm nearly blissful and to think that I can actually share it with everyone makes me even happier. I have looked online for tutorials on this and can't seem to find any. So I decided to make one myself.

Disclaimer: This is my first 'real' tutorial. If I missed something or something was a bit confusing just tell me and I'll try to explain it.

Hope you all enjoy. :)


Photobucket


Choose your fabric. It's fine to buy something a little cheaper for the back, since no one is going to see it. In fact I got both of these fabric pieces in the clearance section at Wal-Mart. You will also need, matching thread, batting for the middle, and binding for the edges. And alot of pins.
Photobucket


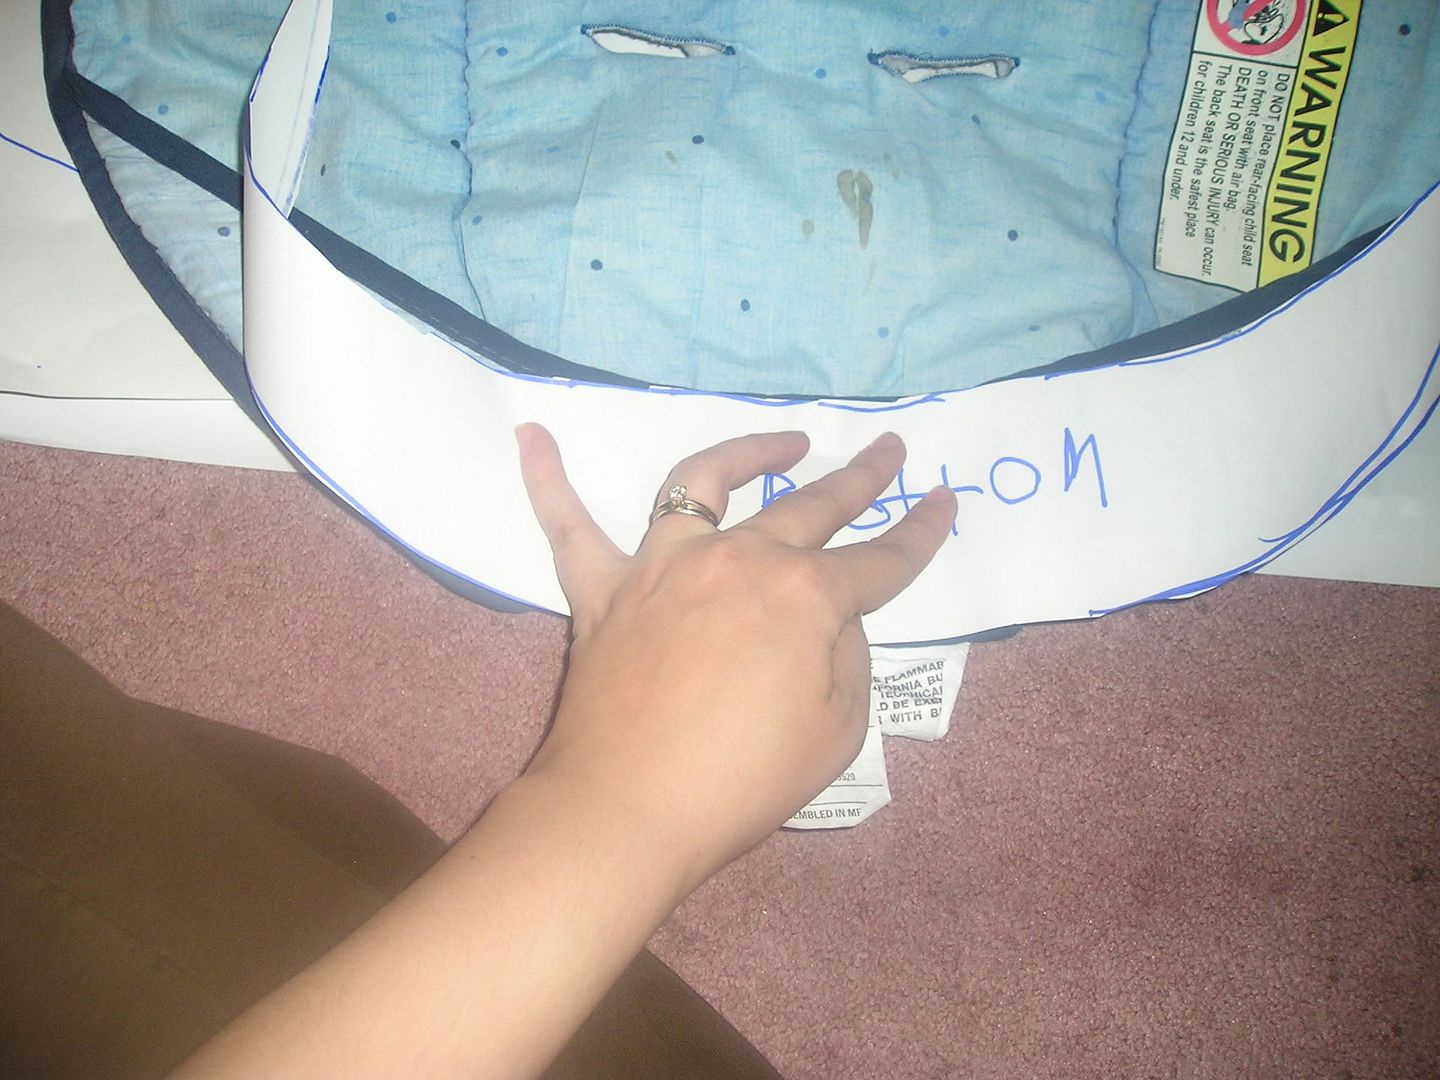
Take your old car seat cover and lay it flat on the paper you've chosen to use. You will have several sections you need to trace: A top, a bottom, and any sides or overhanging areas.
Photobucket

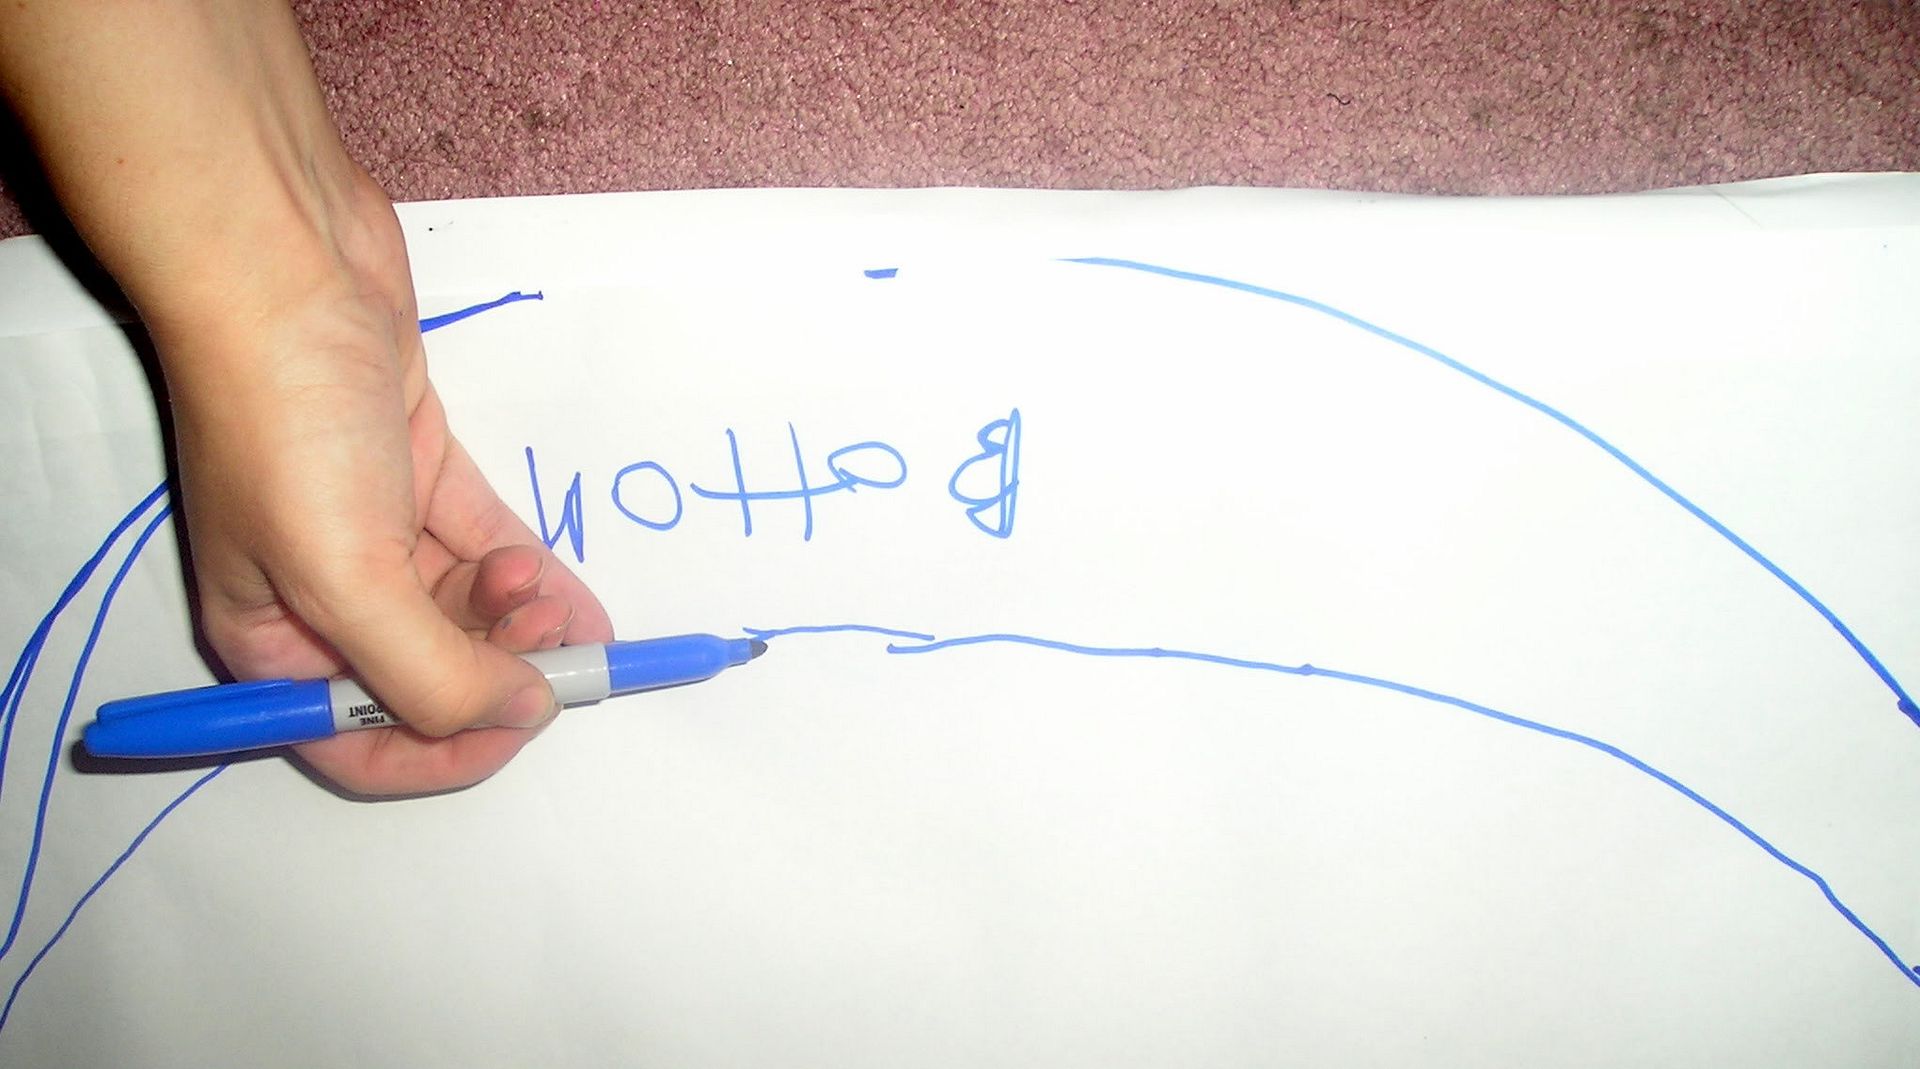
Now draw around the first section of the layed out car seat.. Generally speaking you can assume that the binding is hiding your seam so you don't need to make an allowance for it, but be aware that the issue might arise.
Photobucket

Be sure to mark any parts that lie on the inside of the pattern, like strap holes and any extra stitching.
Photobucket

Your patterns will start looking something like this.
Photobucket

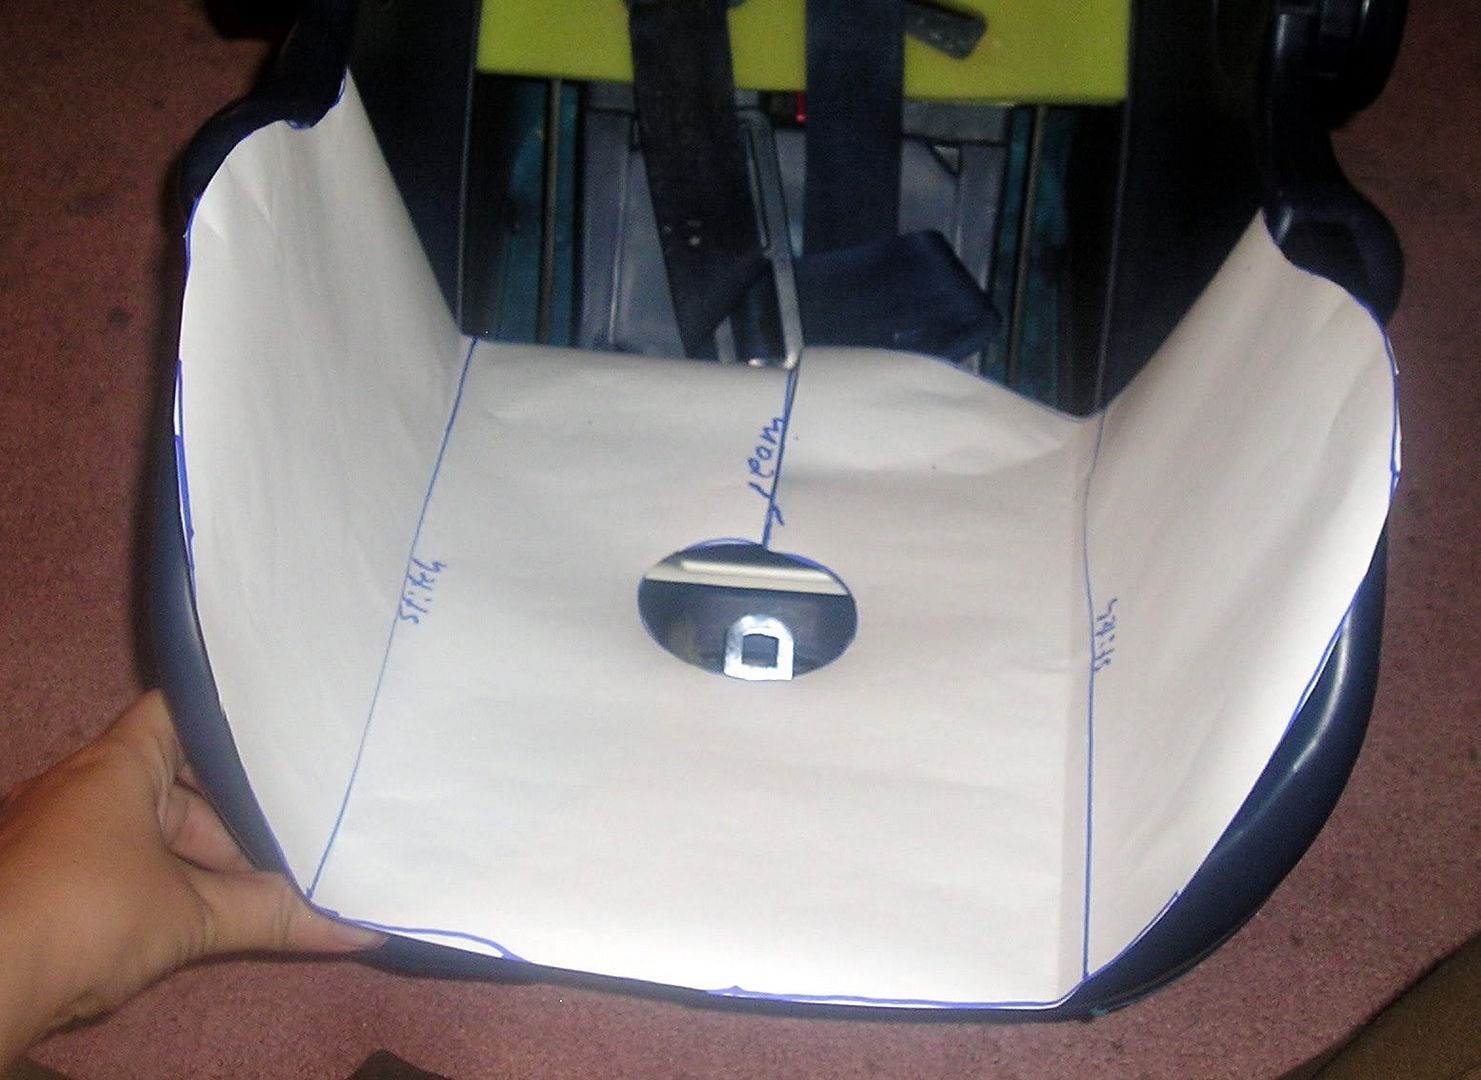
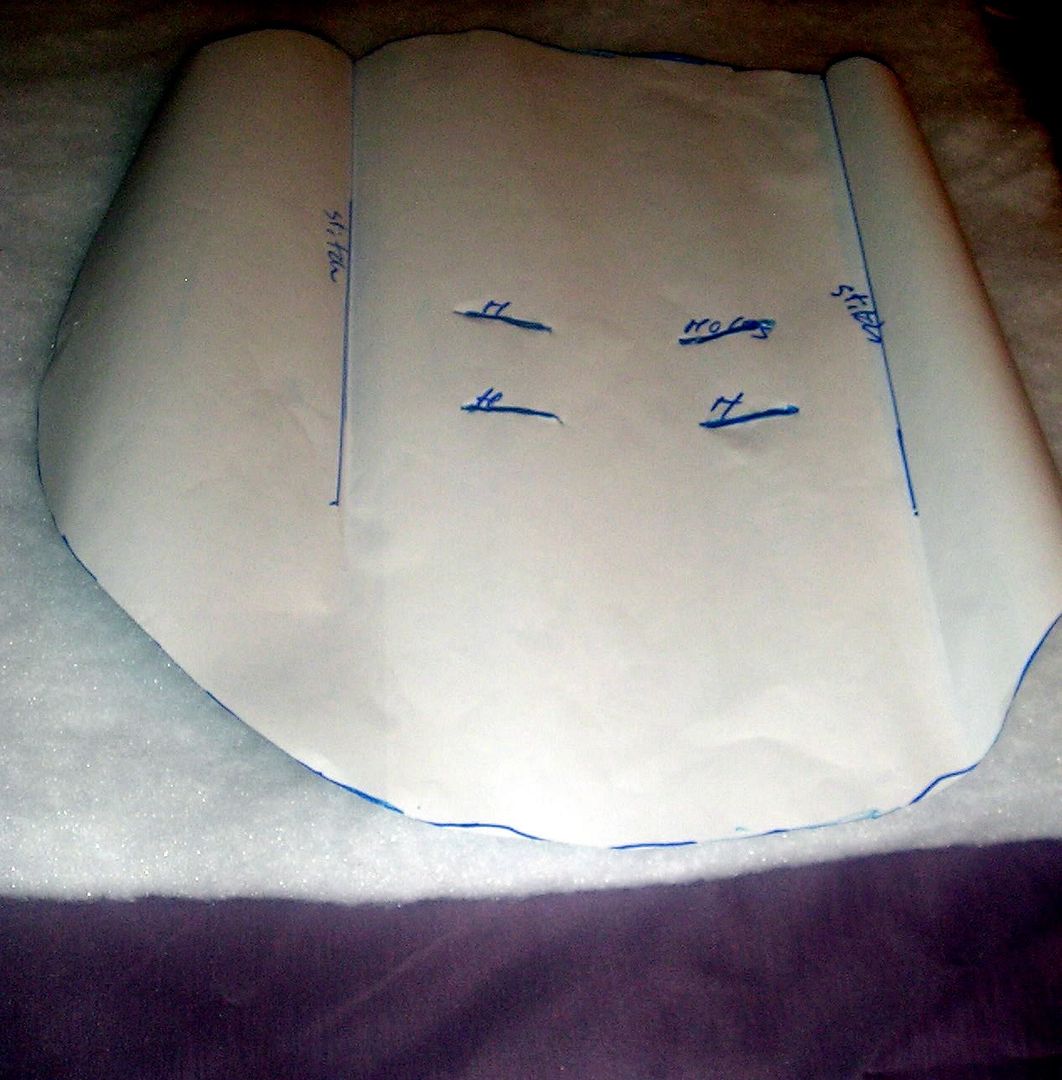
When you cut out your pattern sections, remember to write what each line is for, and cut any holes so you can mark your fabric.
Photobucket

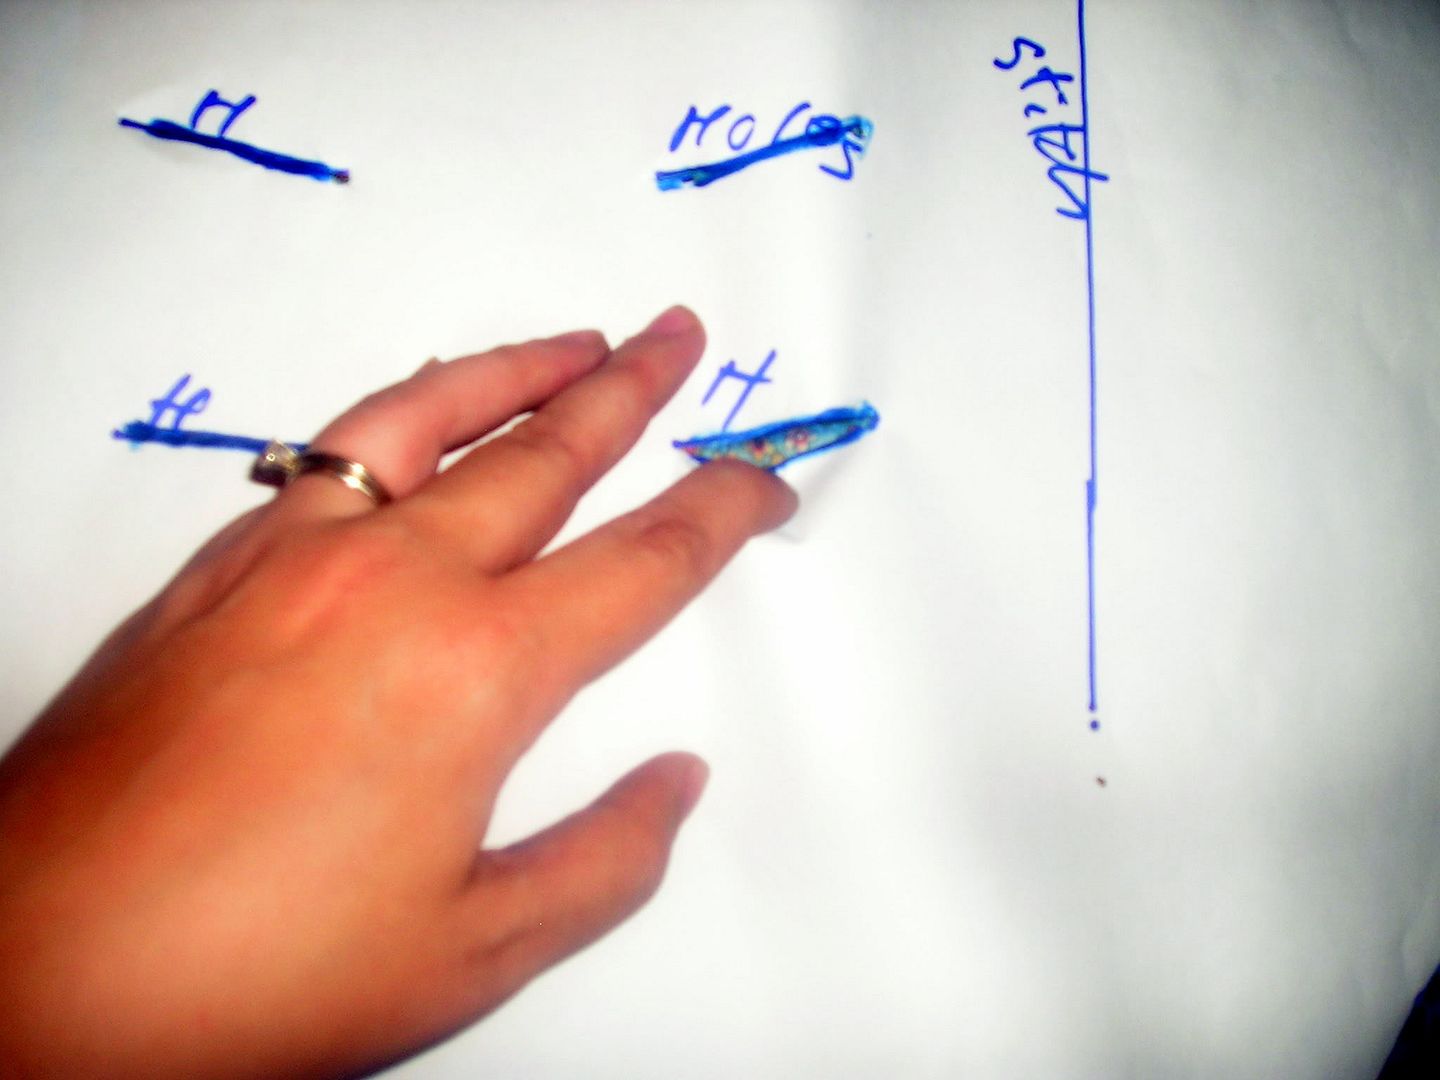
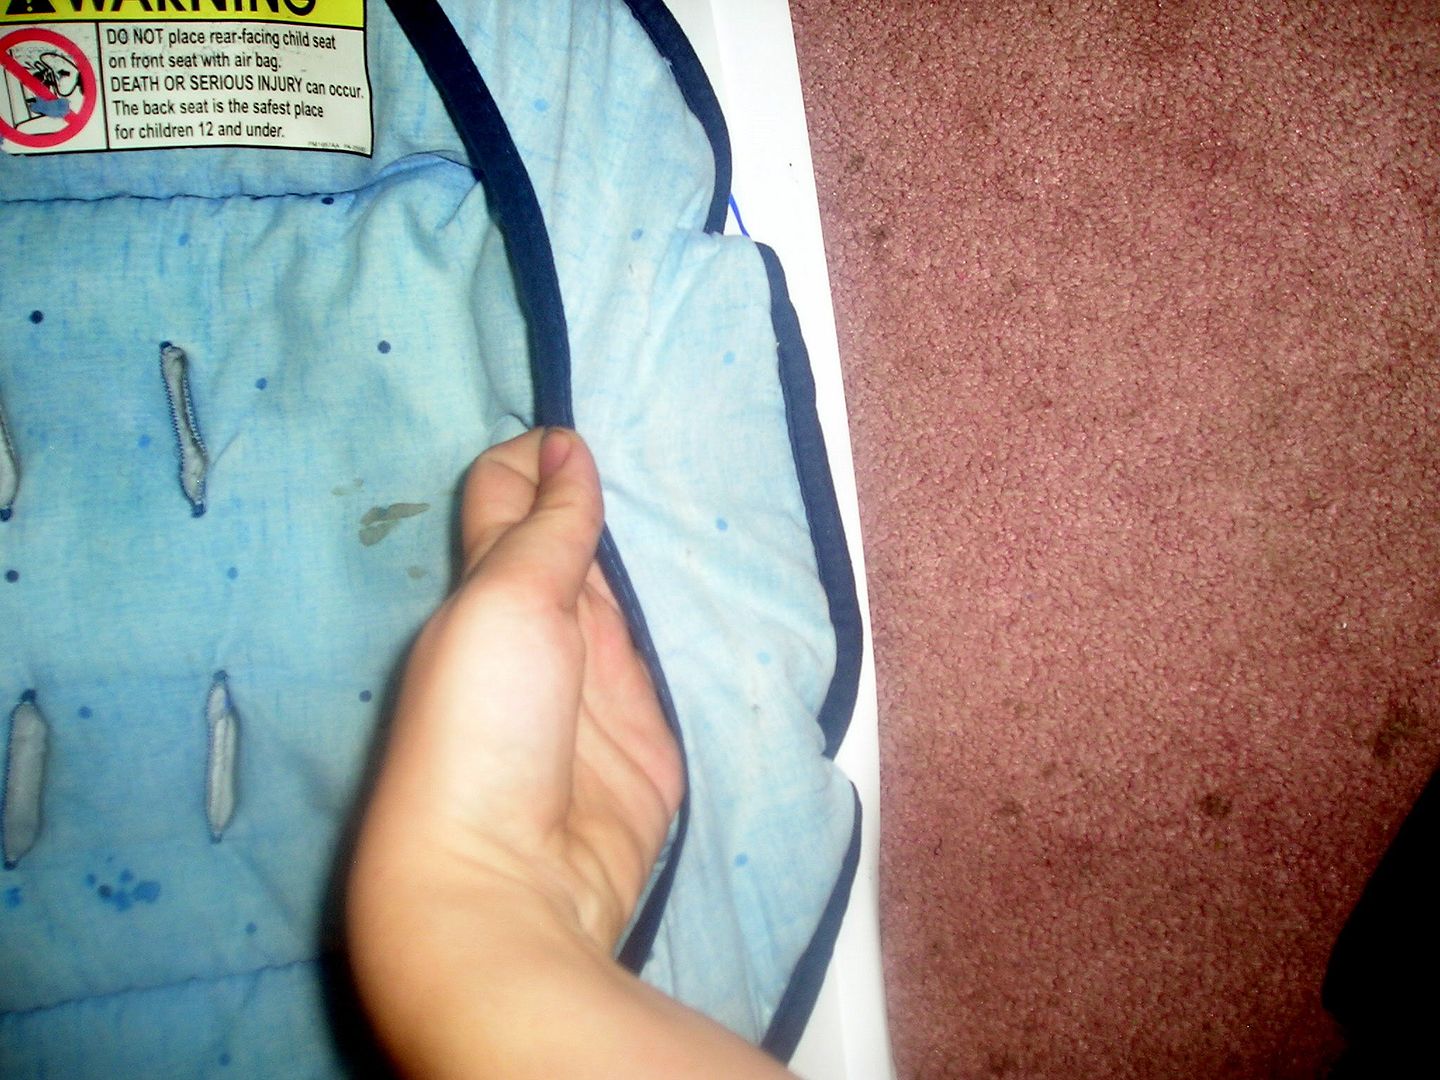
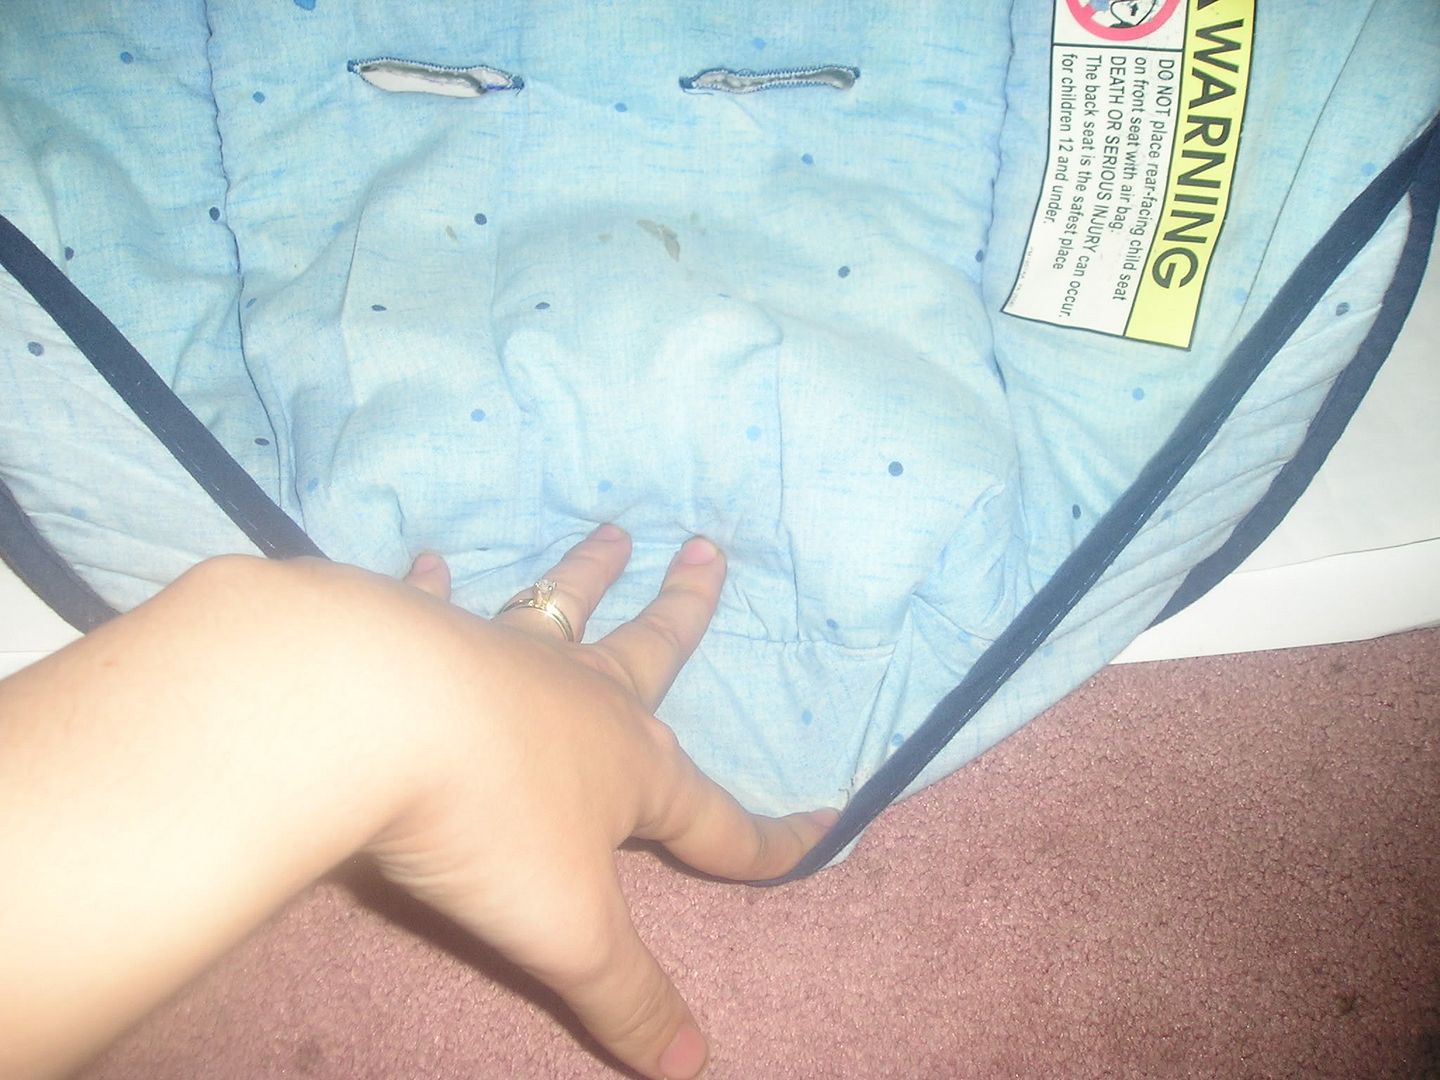
This bit of the pattern is a tad  trickier. This is the overlay that is found on the top and bottom of the carseat
Photobucket

As you can see, you can't just draw around it. So you're going to have to eyeball it. Don't get panicky! It's still just paper.
Photobucket

First I traced around any parts that I could.
Photobucket

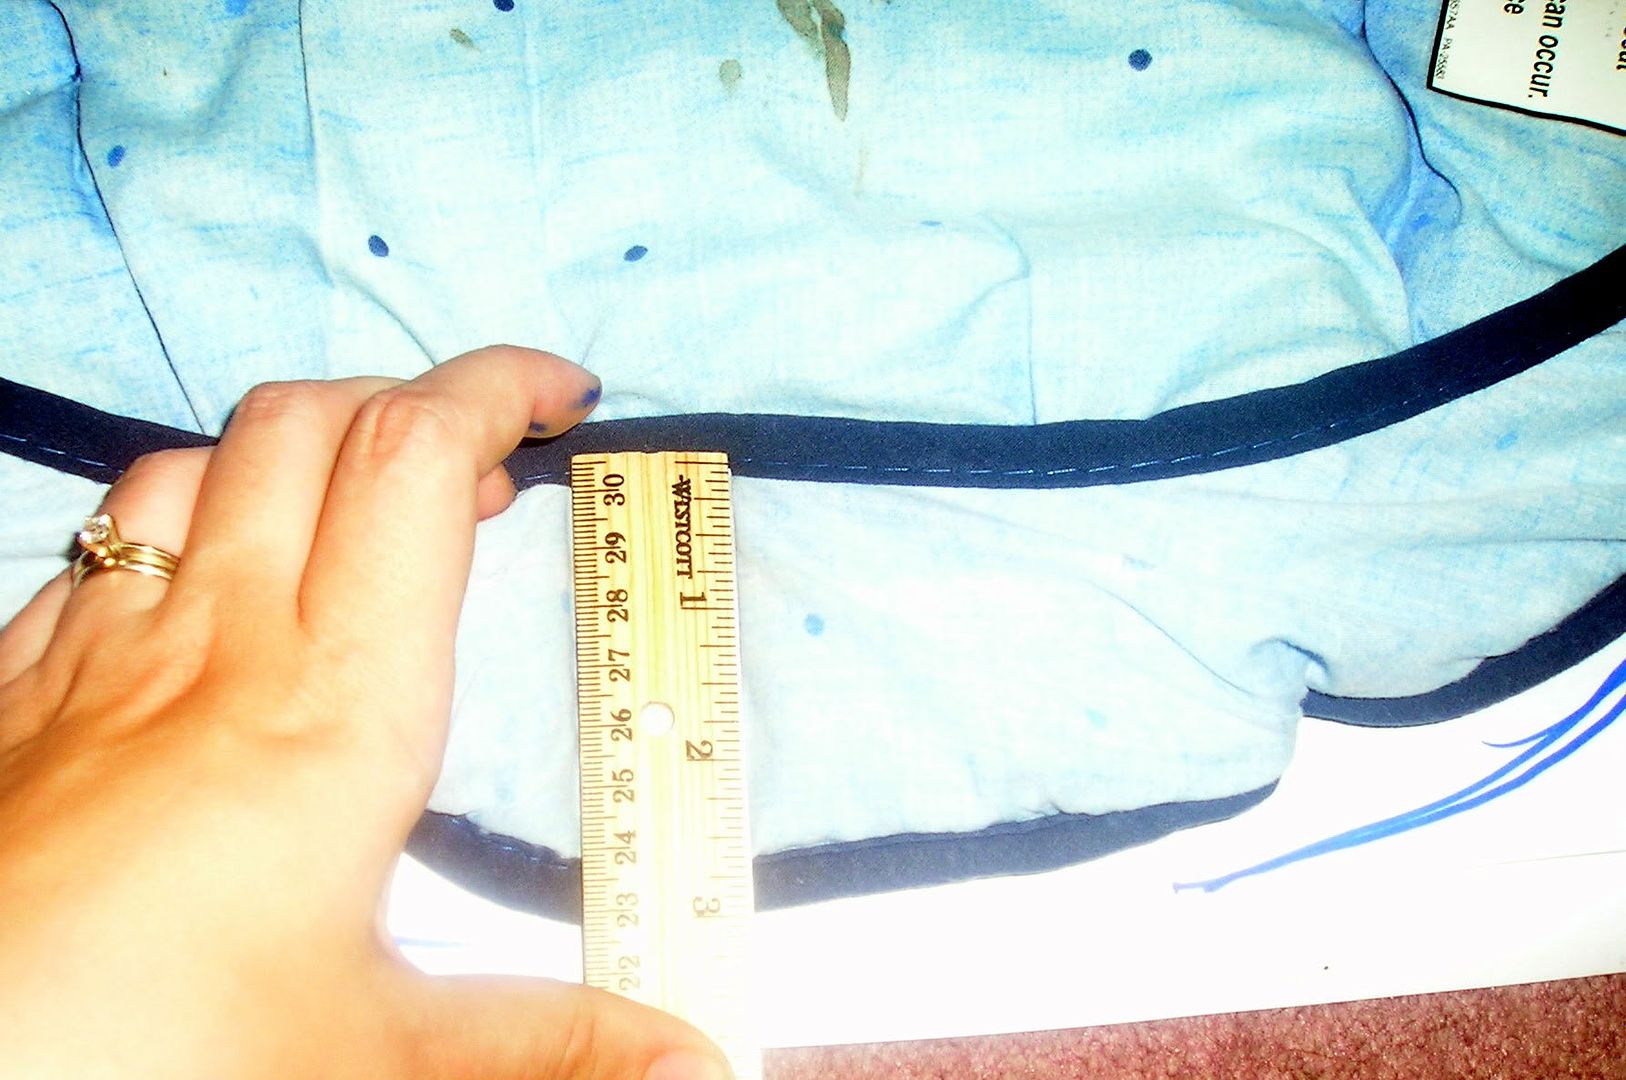
Then I measured the center most point and marked the top on my paper (where I couldn't trace) I also measured a spot on either end where it was about an inch wide. In essence creating a connect the dots.
Photobucket

Then I followed that path around.
Photobucket

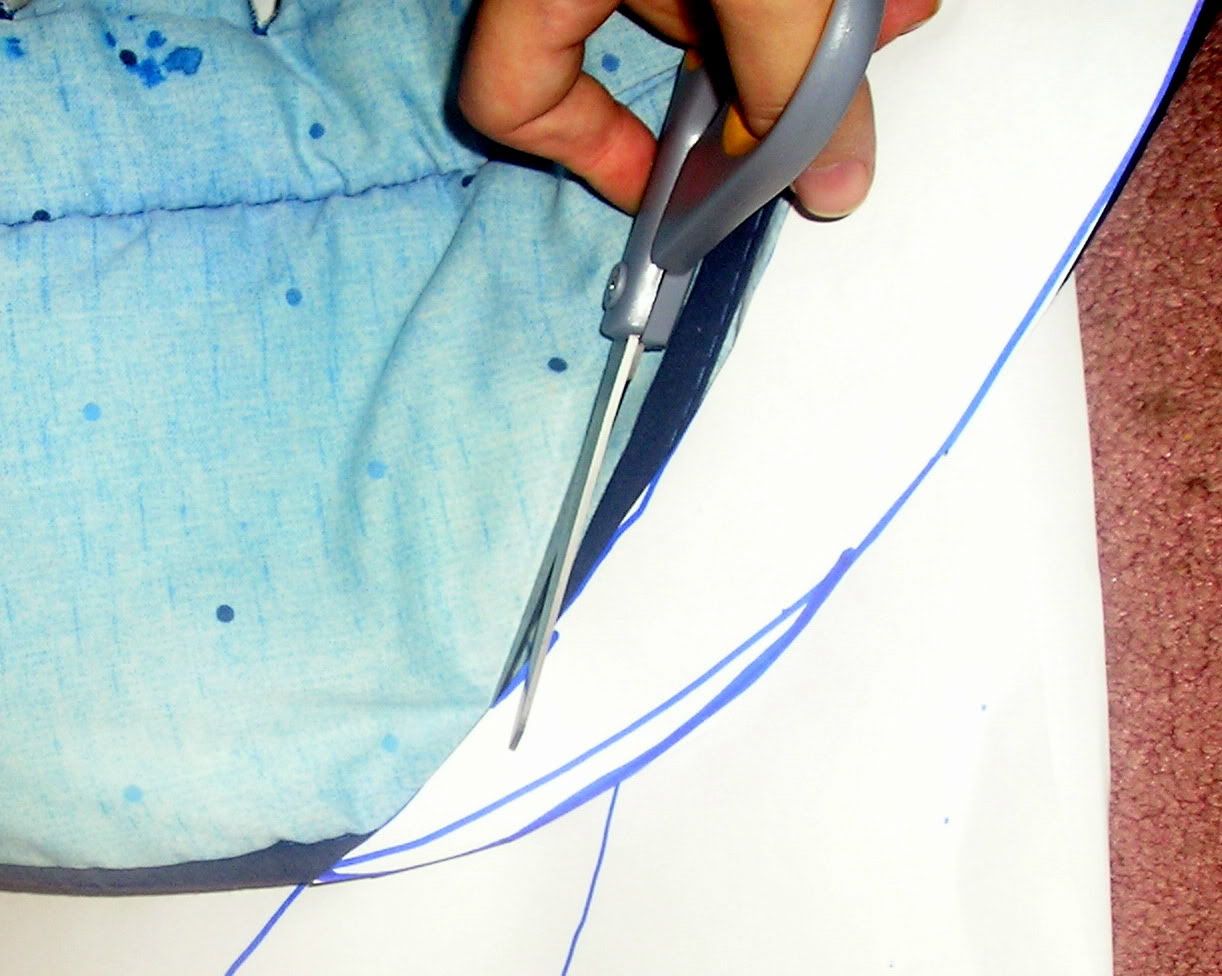
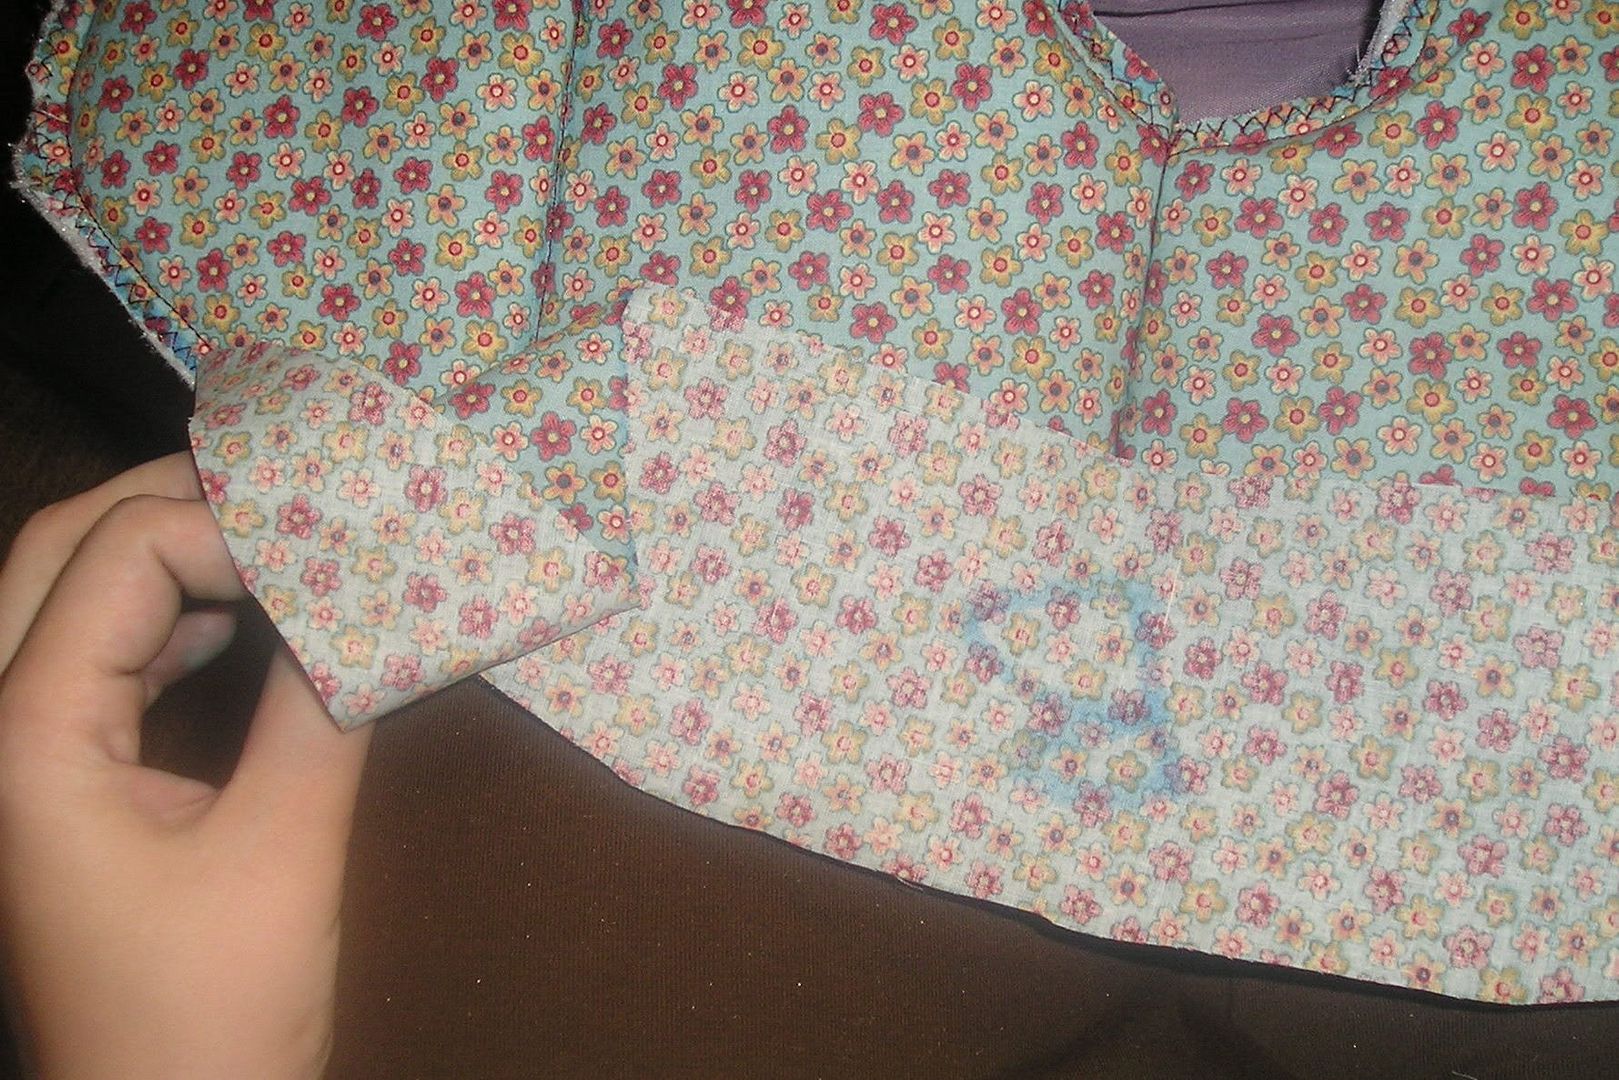
To make sure I had actually done what I wanted, I cut out the pattern piece and layed in on top of the section of fabric.
Photobucket

It was a bit off so I cut my pattern paper to match.
Photobucket

After you have cut them out. Lay them into your carseat to make sure everything fits. This is a moment when you can see any glaring mistakes you may have made (before you cut fabric).
Photobucket

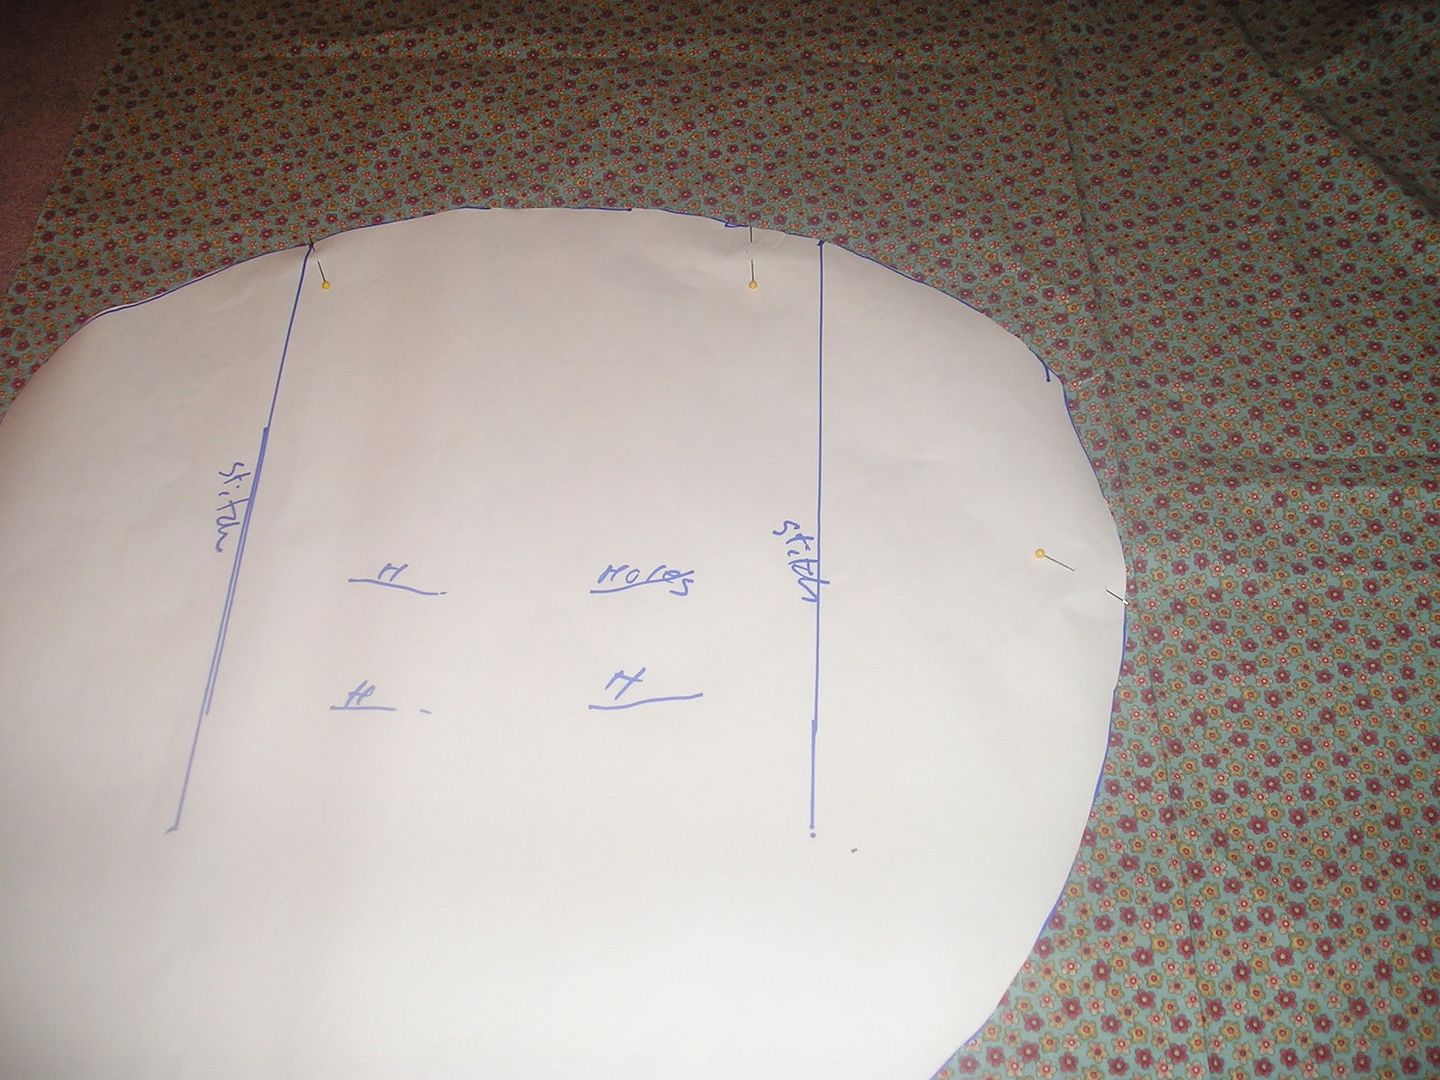
Now pin the pattern to your fabric, being sure to avoid any bulging or folding fabric underneath.
Photobucket

There are two ways you can cut your pattern. You can trace around it with a pencil or other fabric friendly instrument. Or you can leave the pattern attached and cut around it. I generally like the former, since the paper can be annoying to work around.
Photobucket

Once you have all the pieces cut out, you should lay them on the carseat like you did the pattern paper earlier. I didn't get a picture of this. But it's worth doing, so you can catch any bad mistakes. Then repeat all the previous steps with batting and bottom fabric.
Photobucket

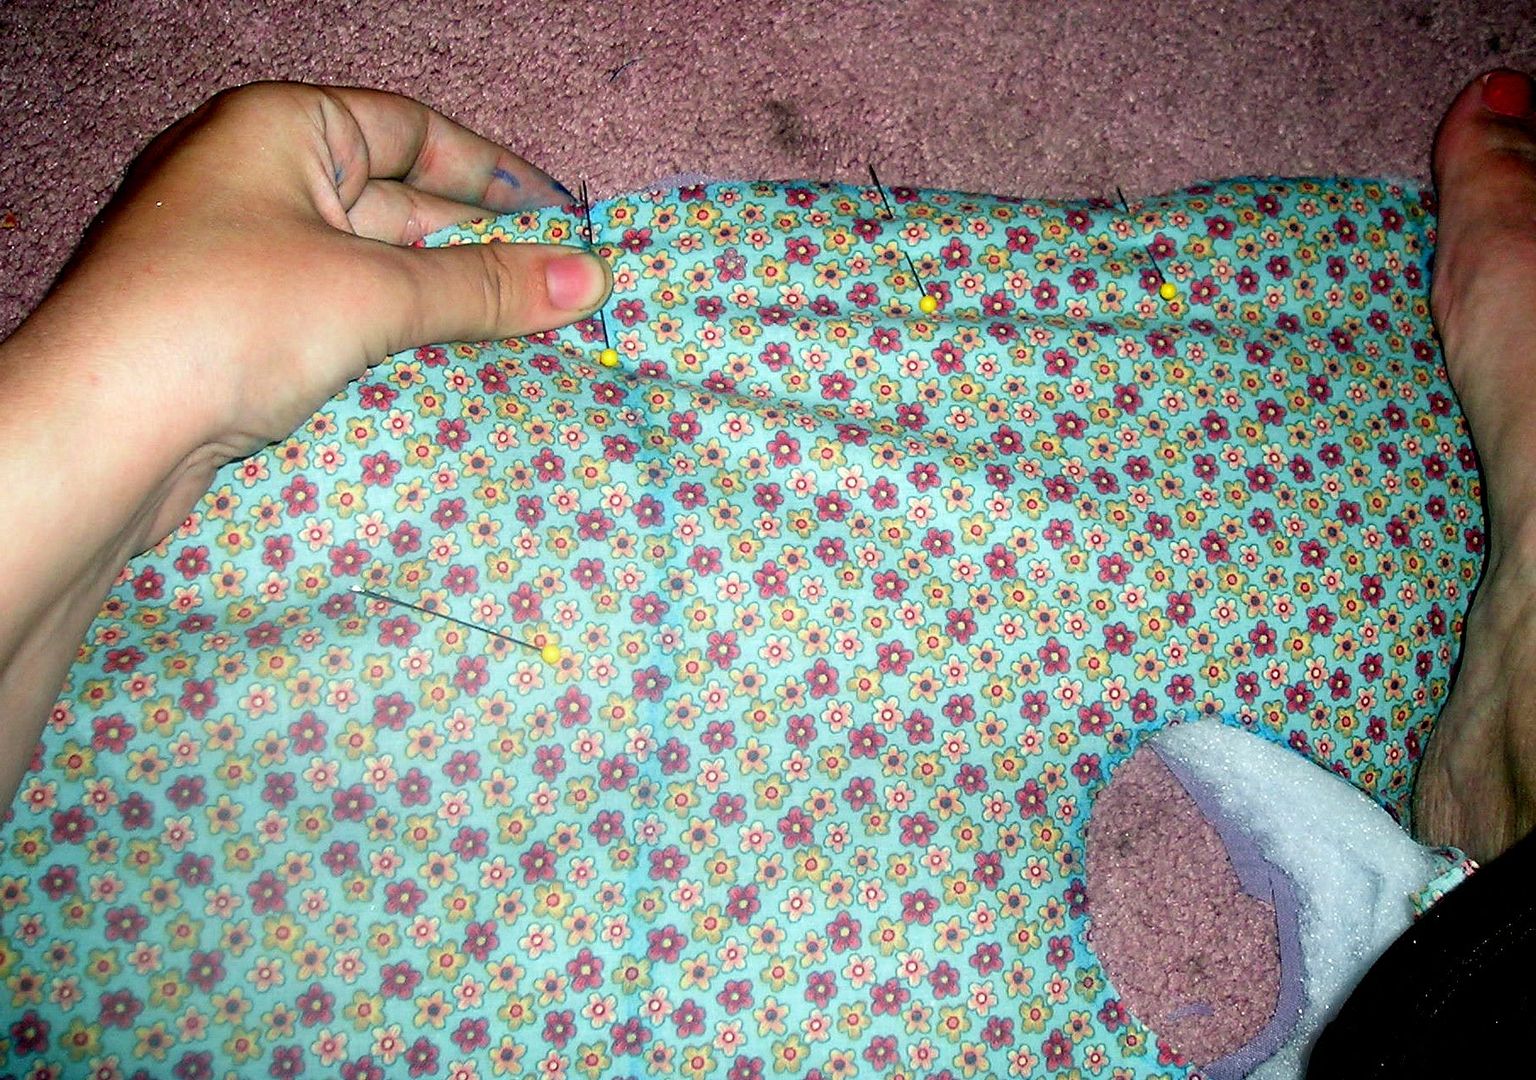
Because you have the batting in the middle and you are essentially quilting it is important to pull tight when pinning and sewing. If you don't you're going to get bunching and bubbling. Notice how I used my foot to hold one side while I pinned... yeah, I'm lazy. Just remember to let your sewing foot move on it's own as you are holding things tight (during the sewing).
Photobucket

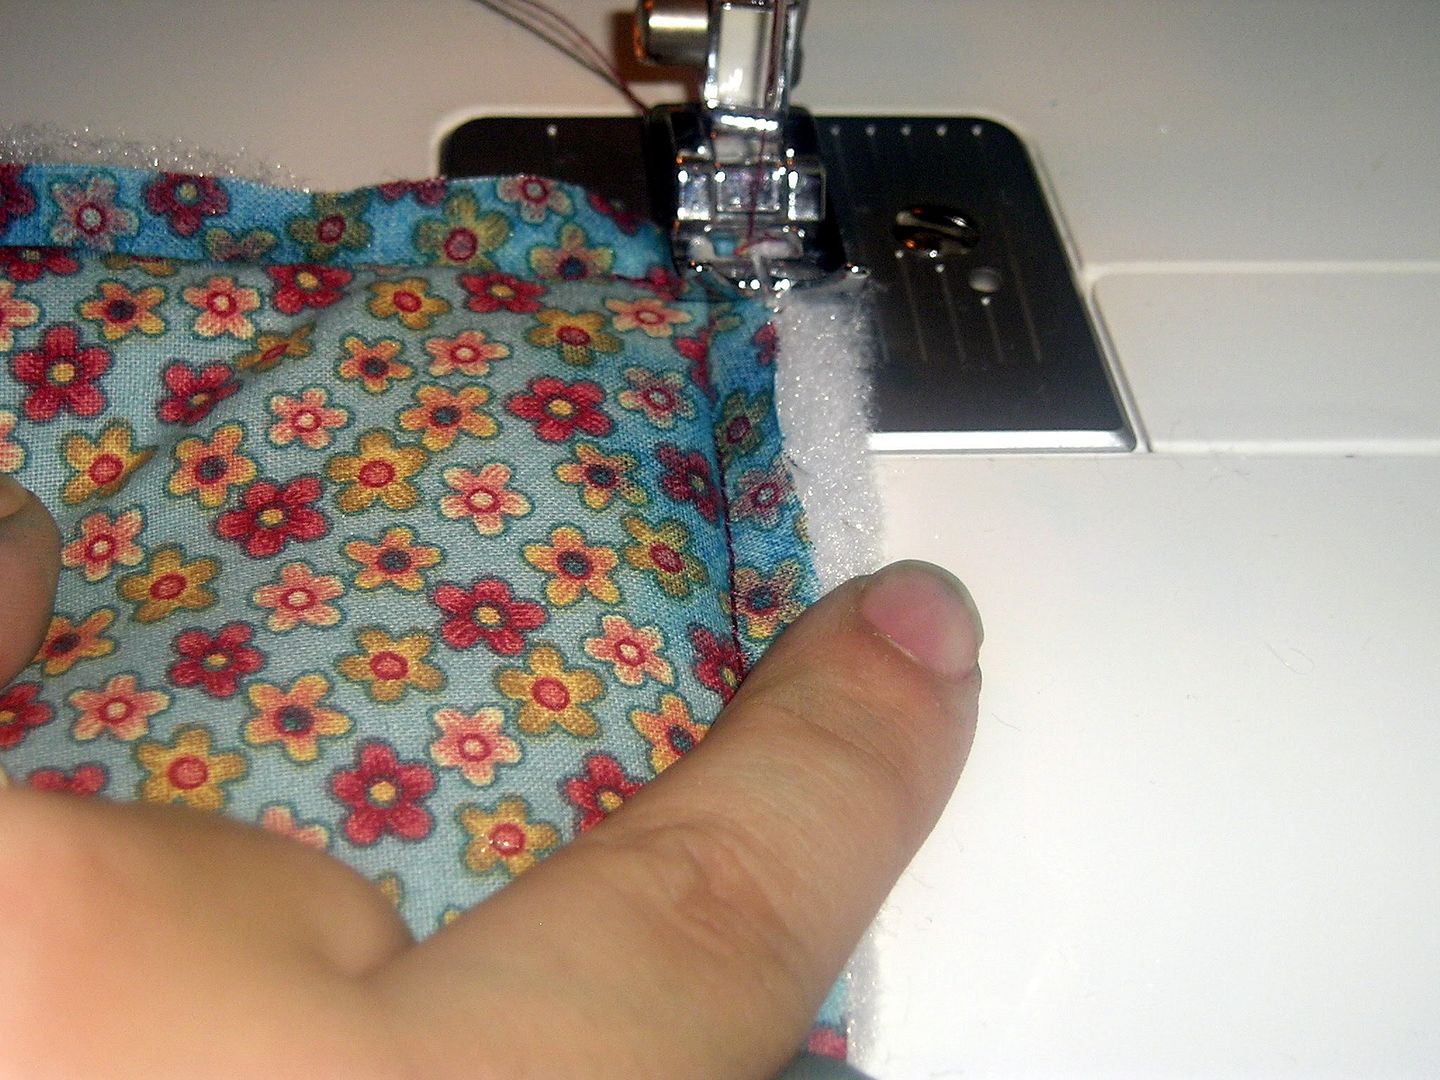
Now is where we begin sewing. Use about a quarter of an inch straight stitch and if you need to, go slowly. You're going to want to stitch any inner parts as well (strap holes, corner stitches) right now as well.

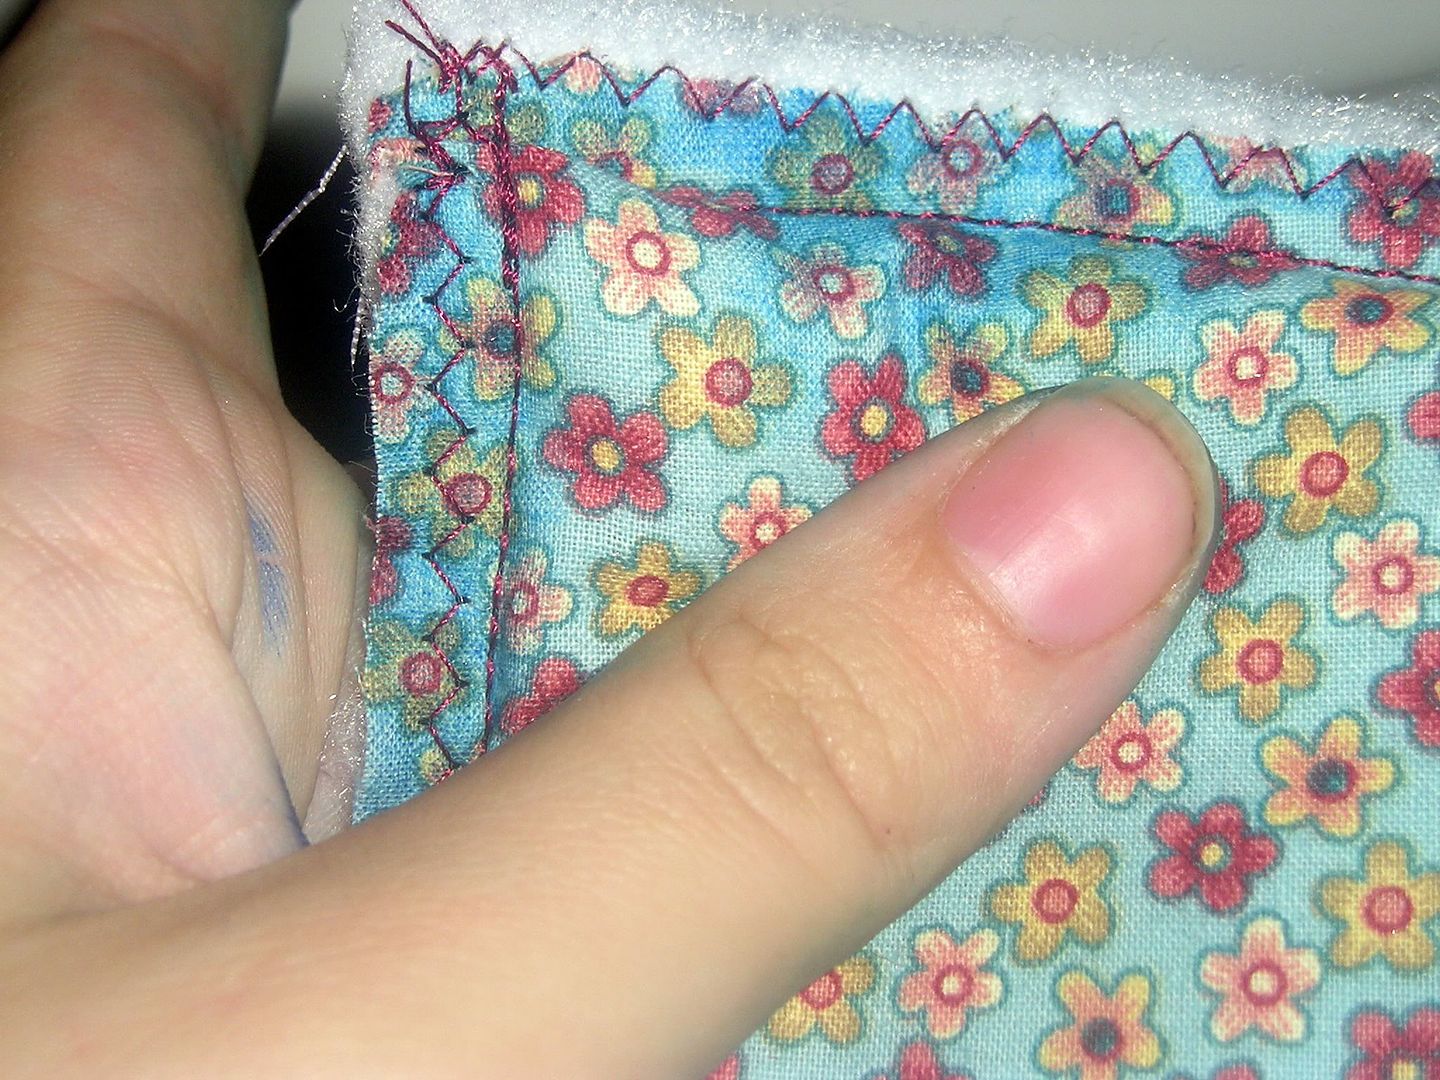
When you are done going around the first time it's probably a good idea to go over it again with a zig zag stitch to secure everything and prevent fraying.
Photobucket

See....
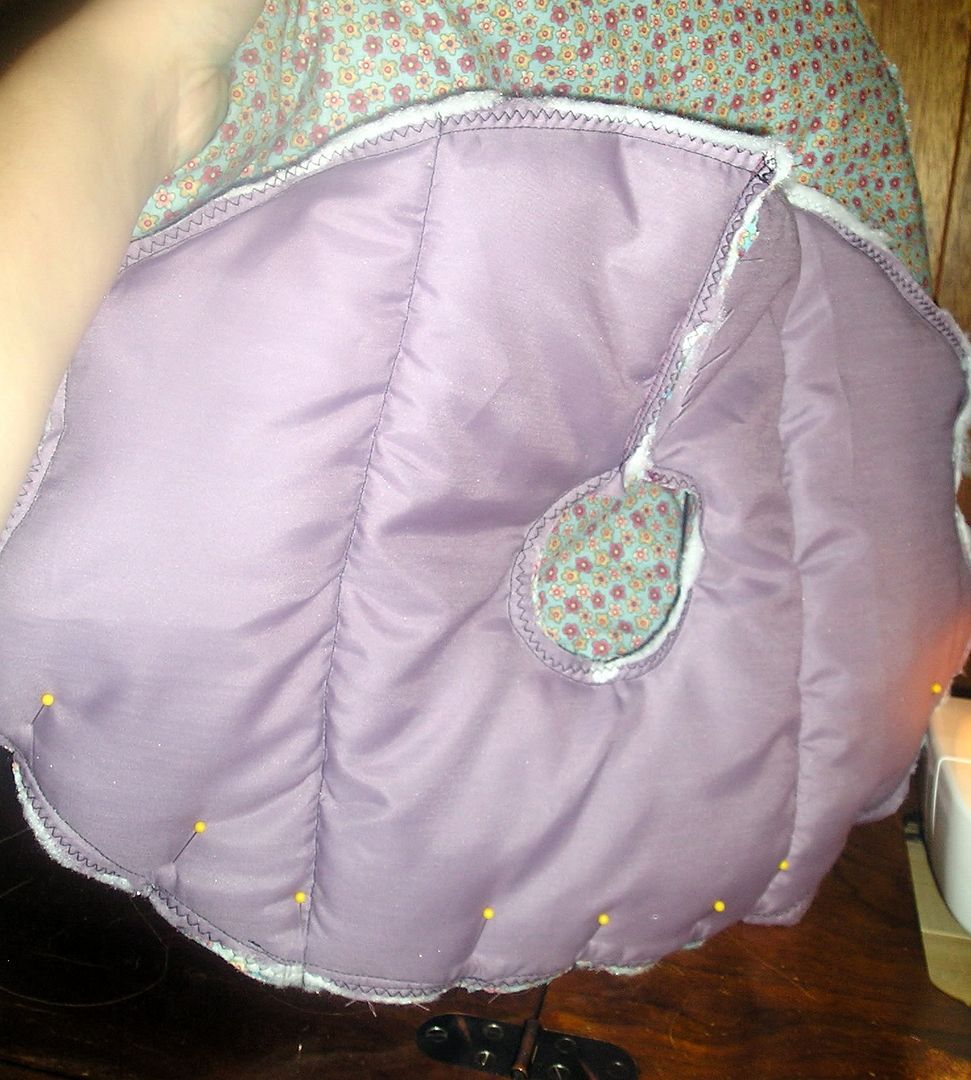
Also remember that the zig zag should not go OVER the straight stitch. The zigzag is like a dirty little secret we want to keep hidden. No one needs to know you did this part because it's not pretty.
Photobucket

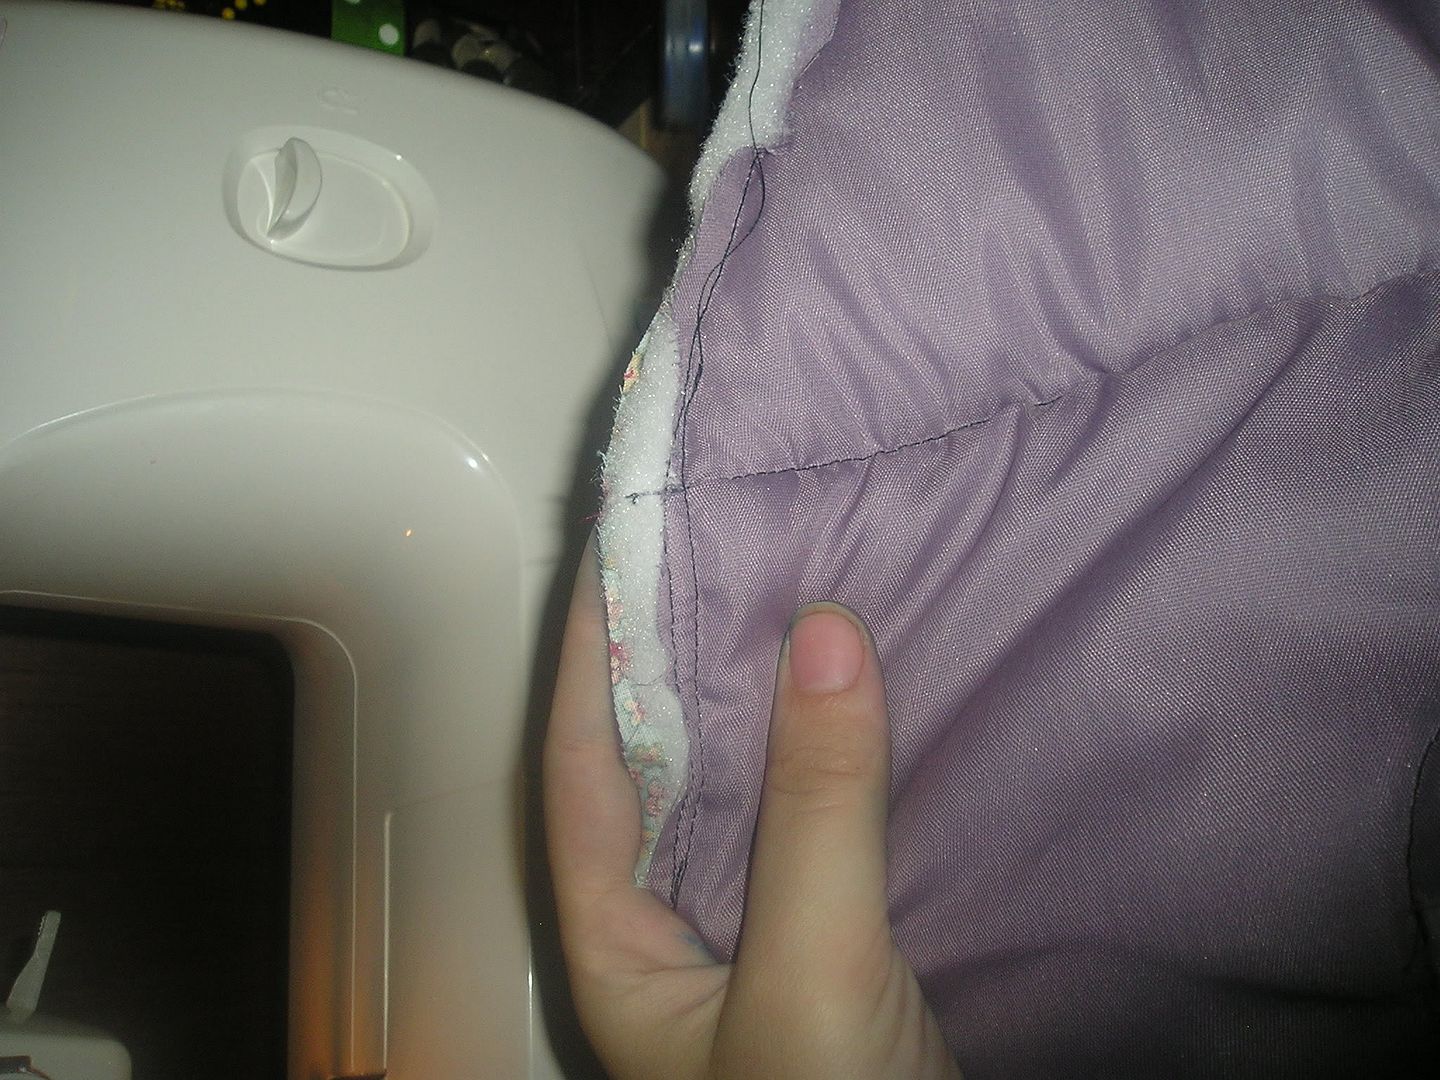
Also check your back to see if you missed any of the solid fabric. I did at one point and needed to stitch over that section again, a little closer in.
Photobucket

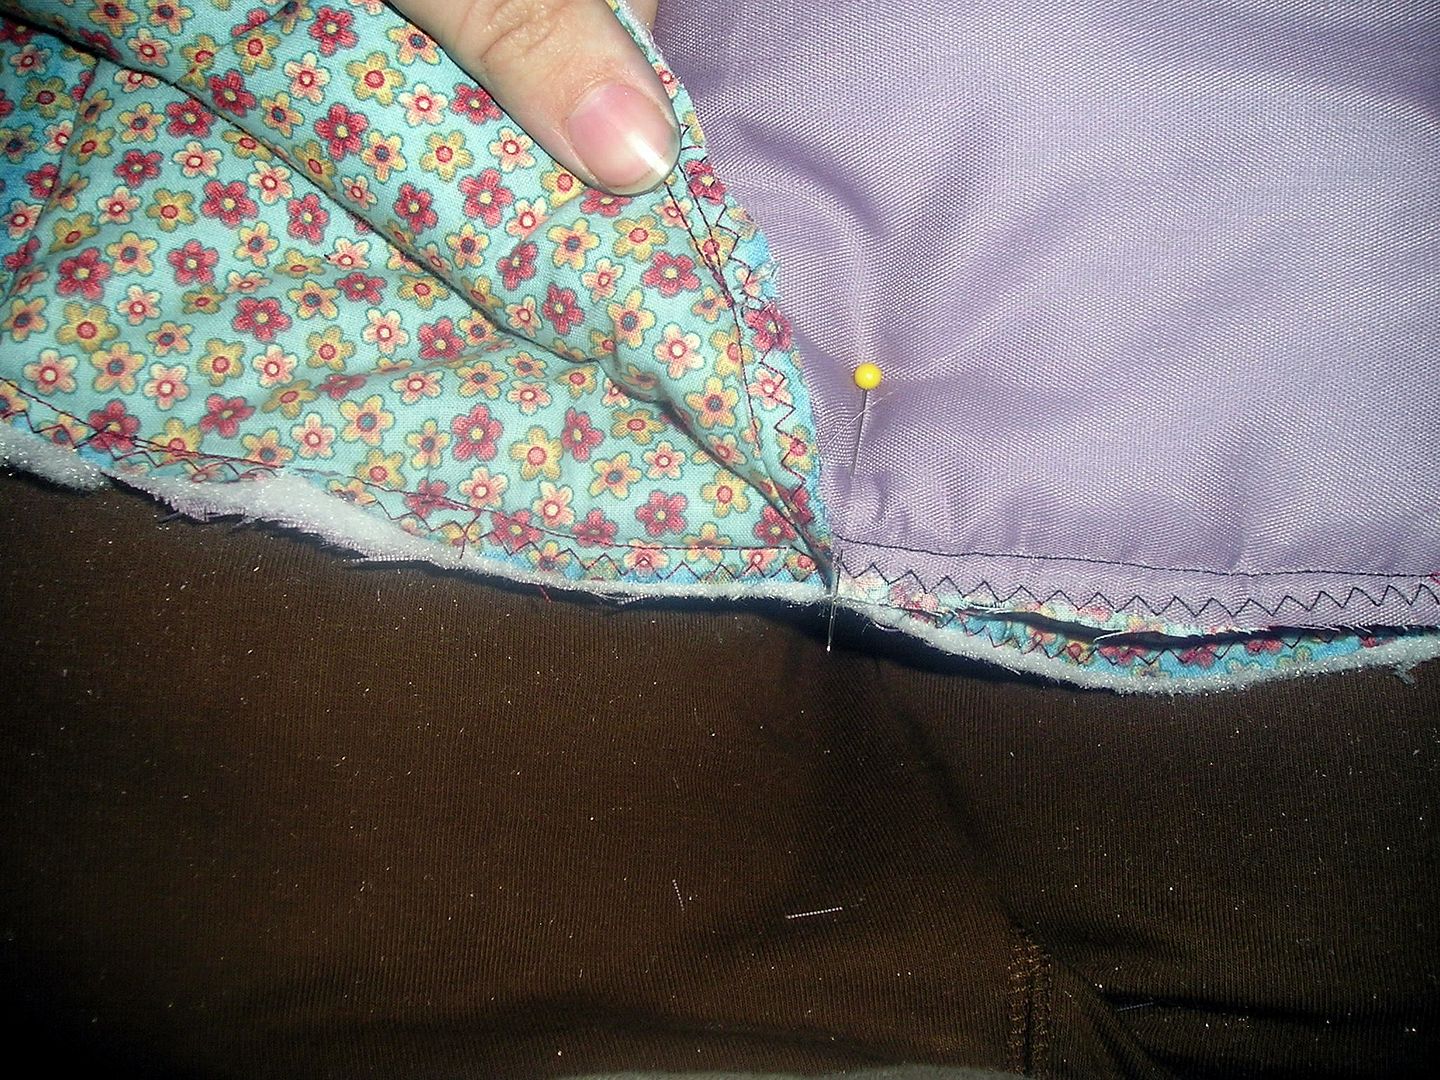
  You should have your top and bottom parts all sewn together (both fabrics with the batting in the middle). Now you need to sew these two sections together. Lay the pieces right sides together and pin. You probably want to check your old cover to make sure you pin to the right points (and not to high up).
Photobucket

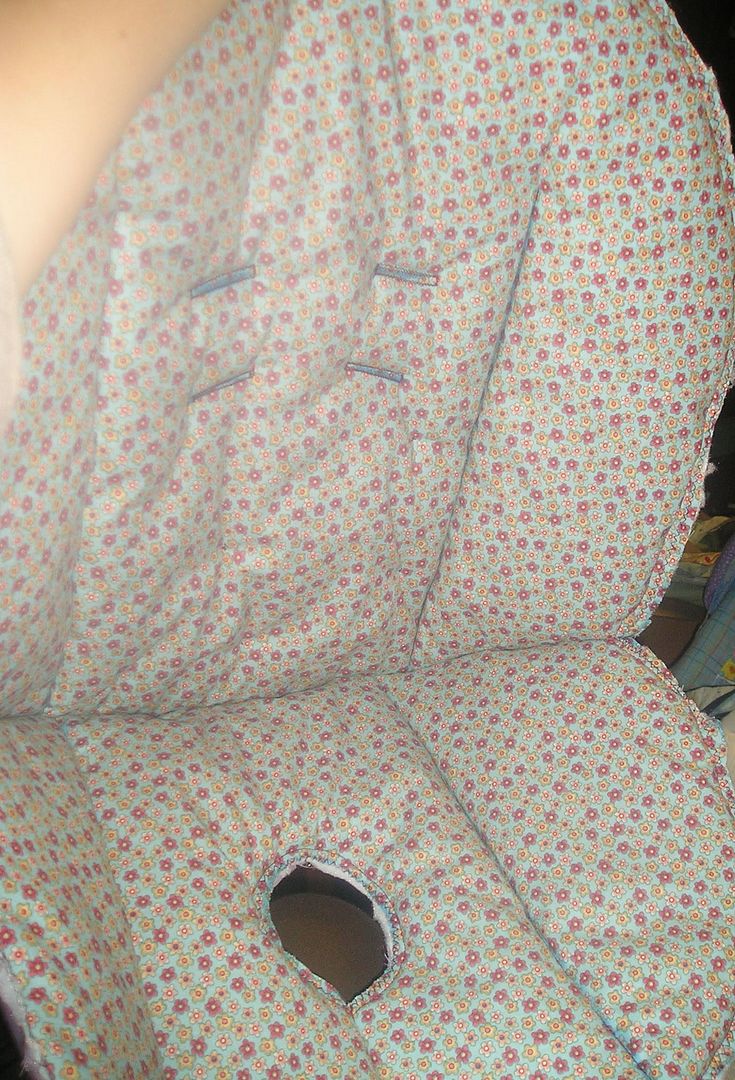
Like so....
I've already stitched the buckled opening(that circular part in the center) so all I need to do with that is put on the binding.
Photobucket

Sew the top and bottom together. Go slowly if you need to. Remember to align any extra stitching you've done... probably a little better than I did.
Photobucket

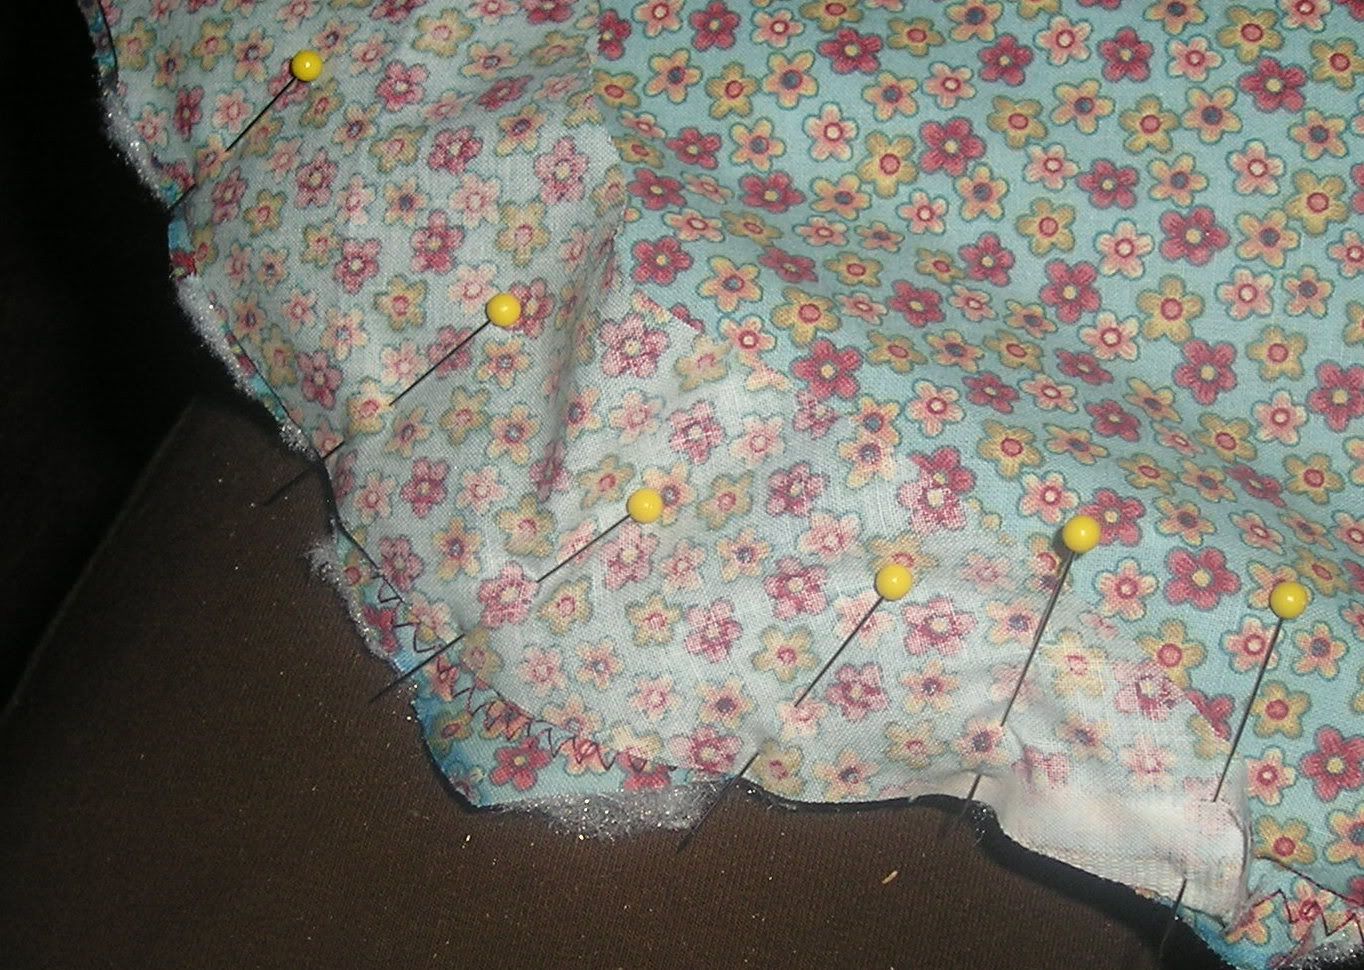
Now is when things start heating up. The overlays (the parts that really secure the cover to the carseat). These fit a little differently and aren't as easy to pin. And if I were to do it over I would have sewn the binding on these parts BEFORE I sewed them onto the rest of the cover.
Photobucket

See how the pins area little bunchy. That's because I had to mold the fabric sections together. So when you begin stitching you'll need to hold these parts to their right spots... they won't like it, but it's important.
Photobucket

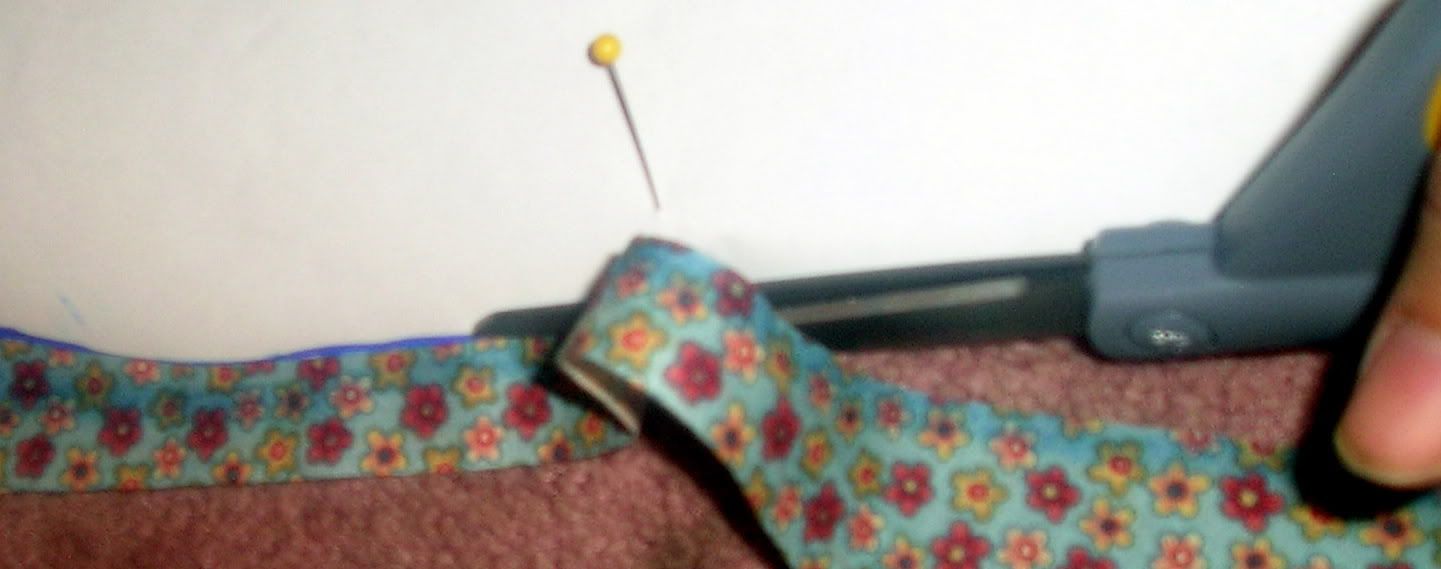
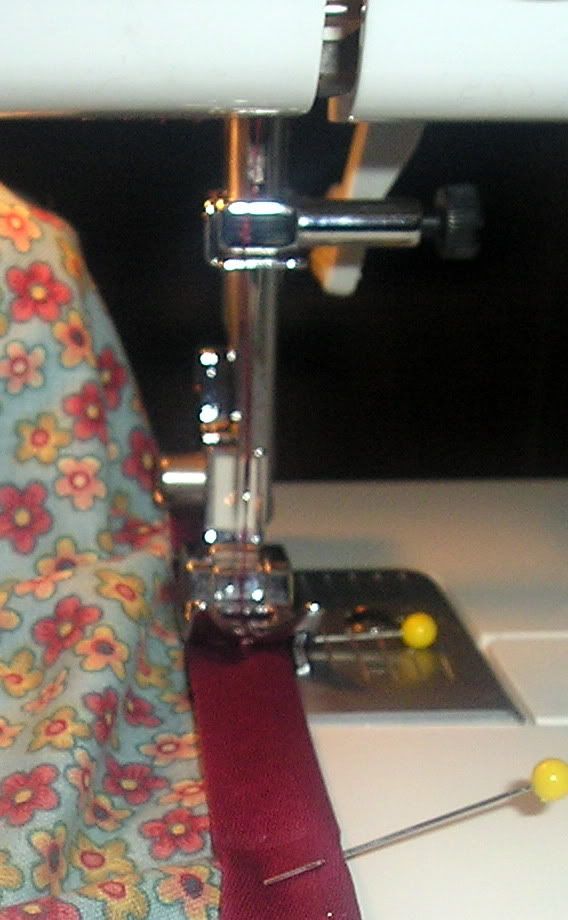
Now you get to start on the binding. It's a bit awkward to work with and requires a lot of pins. You'll want to make sure your fabric fits snuggly into the fold without being doubled over. Pin the binding to every place that the old cover had binding. Most especially the visible parts. This is what will give it the 'finished' look (and cover the seams).
Photobucket

Straight stitch close to the inside edge, but remember that you want to catch the fabric that is now inside the binding.
Photobucket
The binding around the buckle opening was the hardest. I used a lot of pins and it still didn't turn out very cute. (sorry bad picture)


But...once your binding is on you should have the finished product! If it didn't work out I'll allow you to cry.
If it did...
Voila! The baby loves it.
Photobucket
cannwin.blogspot.com

How to transition from a crib to a Big-kid bed

We are about to embark on lots of changes for our daughter, beginning with moving into a big bed. For the past several months we have had 2 beds set up in her room, making her room look ridiculous. My husband was a little anxious to have her in a big bed, so we tried it during the summer. After 2 nights of her screaming (she learned how to open doors the first night) we decided to try later. Well I think now may be later.

I would like to know any tips or tricks you use when putting them to a big bed. We've got those white plastic things to go over the door knob so she won't be able to open the door, but other than that I am planning on taking down her crib, so that's not a temptation for her (or me...) and just bearing through it.

How did you make it a good experience? Or was it not a good experience? Would it help to get rid of the binky before or after the big move?

November's Crafts


Hello again! Our craft person Kara is still very distracted and busy with her brand new adorable baby! So for the craft of the month I thought it would be fun to do a post about this fun website: So You Think You're Crafty!! They started with 10 crafters and every week they have to do a craft that fits a specific theme and the one that gets the most votes gets to post a tutorial and the one with the least votes is "eliminated". Last week's winning craft was SO cute! So go check it out for lots of Fall craft ideas! Just click on the button!

11.02.2009

Most Embarrassing Moments

Happy November everyone! We hope you all had a wonderful Halloween!
We've learned some fun things about our mommies in the past months and now we want to hear some funny stories! So this month's About Us Q (for authors and readers!!) is what is your most embarrassing moment? Come on, don't be shy! Share it with us! :)

10.29.2009

Soup and Bread

Oh no, I've missed the soup week! Sorry. I just have to share this recipe with you. It is one of our favorites:
Cream of Broccoli Soup
1 c chopped broccoli (fresh or frozen)
1 c water
1 T chicken base
3 T margarine
1/4 c chopped onion
3 T flour
1 c milk
1 c cream
Combine water and chicken base in med saucepan. Add broccoli. Cover and cook over med heat until tender (about 5 minutes).
Meanwhile melt butter in a deep frying pan. Add onions and cook over med heat until onions are soft. Add flour and stir well. Cook over low heat about 3 min until the roux is well formed and light tan.
Keep the burner hot, remove roux from heat and add milk and cream, stirring constantly. Return to heat and cook until thick (this could take up to 10 minutes), stirring well.
Add milk mixture to cooked broccoli-broth mixture and heat through.
Yield: 4 c.

Now, that is a great soup recipe. But what makes a great soup recipe even better? BREAD BOWLS! I can never find them around here, so I decided to make my own. I found this recipe on allrecipes.com (great place to find great recipes!).
Italian Bread Bowls
1/2 oz active dry yeast (the little packs are .25 oz so you'd need 2)
2 1/2 c warm water (110 degrees f)
2 t salt
2 T vegetable oil
7 c flour
1 T cornmeal
1 egg white
1 T water
In a large bowl, dissolve yeast in warm water. Let stand til creamy, 10 min.
Add salt, oil and 4 c flour to yeast mixture; beat well. Stir in remaining flour, 1/2 c at a time, beating well with an electric mixer
When the dough has pulled together, turn it out onto a floured surface and knead about 6 minutes.
Lightly oil a large bowl and place dough in bowl, turning once to coat in the oil. Cover with damp cloth in a warm place til doubled in volume (about 40 min)
Punch dough down, divide into 8 equal portions and shape each portion into a 4 in round loaf. Place loaves on lightly greased baking sheet sprinkled with cornmeal. Cover and let rise in a warm place for 35 minutes.
Preheat oven to 400 degrees. In a small bowl beat together egg white and 1 T water; (I also added some garlic powder to add a hint of flavor) lightly brush loaves with 1/2 the mixture.
Bake 15 minutes. Brush with remaining mixture and bake 10-15 min more til golden. Cool on wire racks.

To make bowls: Cut a circle in the top as big as you like, pull it off, then pull out some of the inside bread. Not all of it! Use what you pulled out to dip in the soup. Pour some soup in your bread bowl. Enjoy!

Yummy!!!!

10.28.2009

Doctor Visits

Sorry to be a slacker with the tricks of the trade question! It's been busy around here! My question isn't so much asking for tricks but more just curious.
I'm wondering how often you go to the doctor? Do you go in to the Gynecologist every year like you're supposed to (not including when you're pregnant)? And in addition to that do you go in to a Family Dr. for a general check up too? Or do you only go in if you have a concern? And how often do you go to the Dentist?
It's easy to keep our kids on a schedule but I'm curious what the norm is for adults.

10.24.2009

Saving Memories

So my girl had her baptism today. And with the help of Jill and her wonderful Bayberry Announcements I was able to send out some dang cute cards for all that family who couldn't make it out for the event.

But I had a few left over and I wanted to do something to help my little one remember her great day.

*light bulb turns on above head*

You know how you go to weddings and people have you sign the matting around their photo instead of a guest book? Well, I took that idea and twisted it just a bit.

Instead of having people just sign their names, I asked if they would please leave some words of advice or encouragement for her on this important day in her life.


We live in a small branch so there wasn't very many people to sign it, but I think it turned out nicely don't you?

Now she will have a beautiful momento to keep for years to come and perhaps when things get a little tough she can look on her wall and see that others love her and understand.

Feel free to use my little idea. *wink* I told my husband it was such a good idea that by next year everyone in the church would be doing it (which would please me immensely) :).